

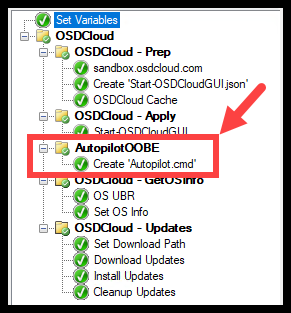
So last time we added a CMD file to our Task Sequence to launch AutopilotOOBE.
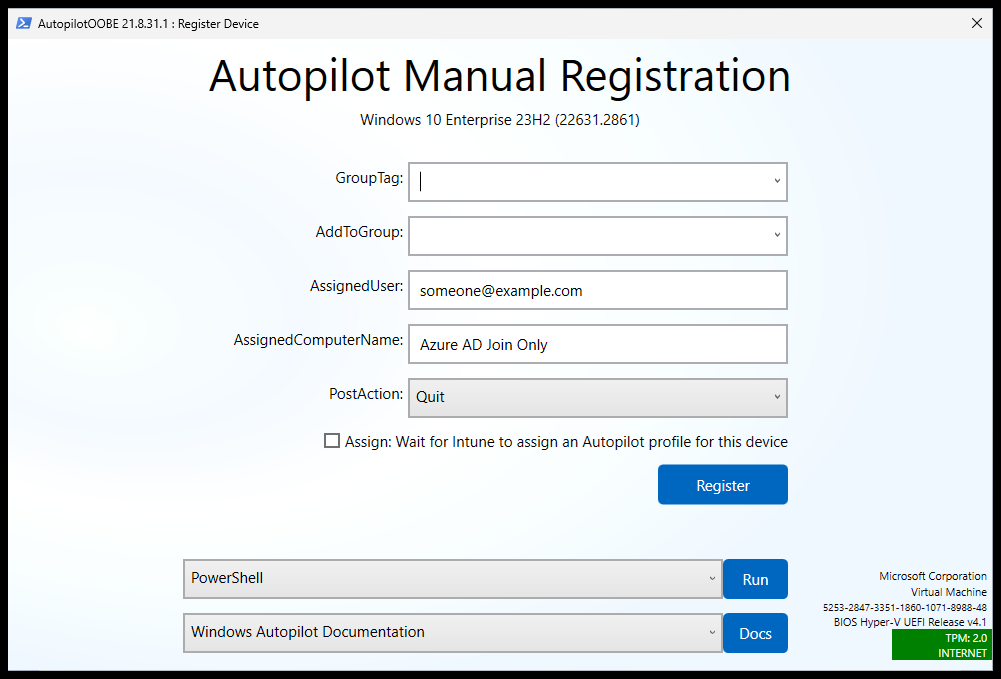
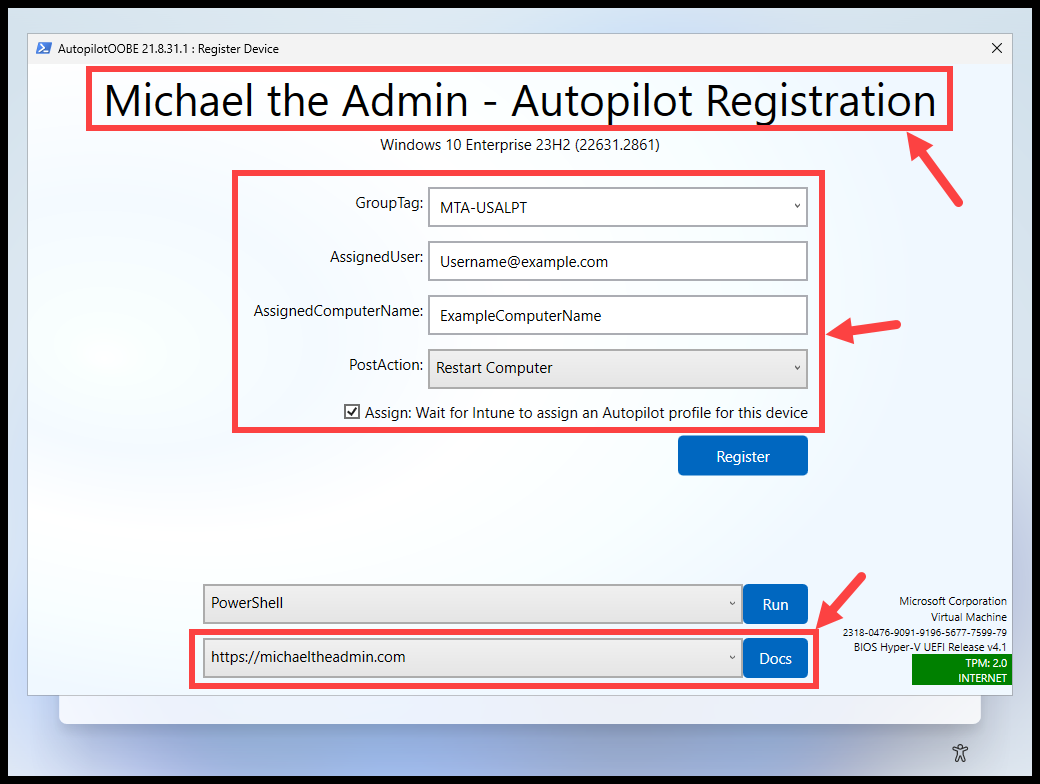
By default you will get the below layout when running AutopilotOOBE.
Additional Information #
Again this is straight from the documentation of AutopilotOOBE.
- The Parameters section talks about all the available options you can customize.
- The Configuration Json section talks about the file you can use to set the Parameters
AutopilotOOBE Configuration Json #
A configuration json file named ‘OSDeploy.AutopilotOOBE.json’ can be used to set the parameters.
Below is the example configuration json we’ll be using in our task sequence.
{
"Title": "Michael the Admin - Autopilot Registration",
"GroupTag": "MTA-USALPT",
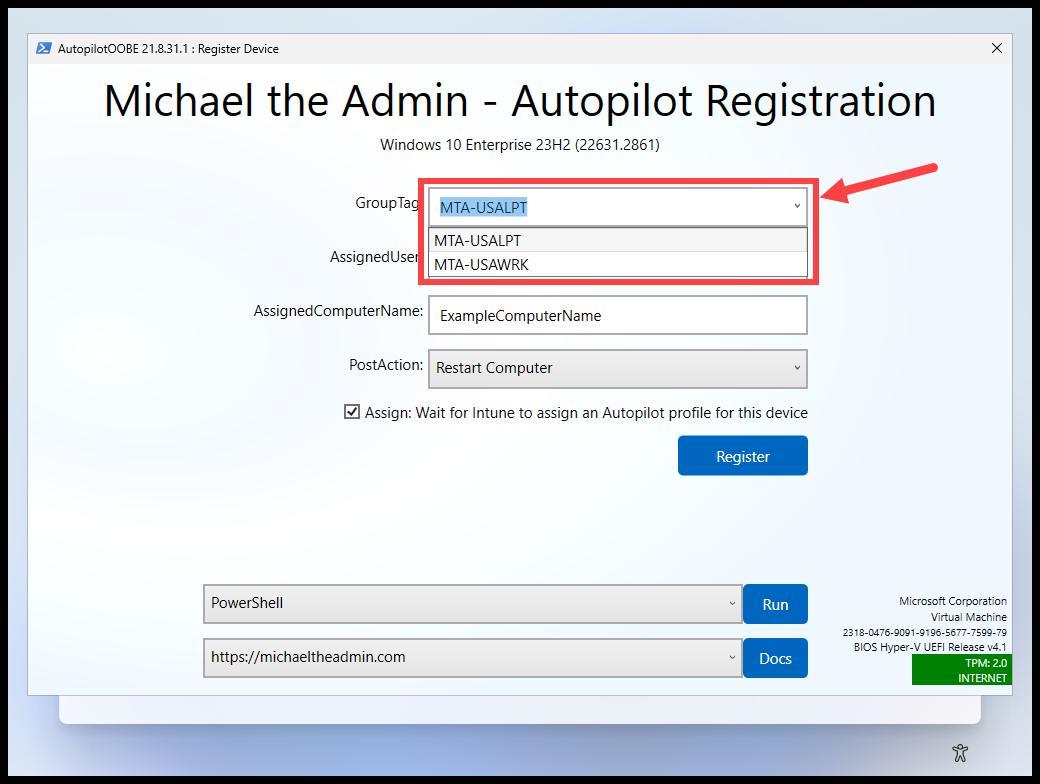
"GroupTagOptions": [
"MTA-USALPT",
"MTA-USAWRK"
],
"AssignedUserExample": "[email protected]",
"AssignedComputerNameExample": "ExampleComputerName",
"Hidden": "AddToGroup",
"Assign": true,
"PostAction": "Restart",
"Docs": "https://michaeltheadmin.com"
}Download JSON File
When using ‘AssignedUserExample’ or ‘AssignedComputerNameExample’:
Something to keep in mind when using these two parameters, is when you select the ‘Register’ button, there are 2 checks performed on the value of these fields.
- First it checks if the Value is Greater than 0
- If nothing is in the textbox, then it won’t add the value to the parameters list. Because there is nothing to add.
- Second it checks if the Value ‘Does NOT Match’ your example string
- So if your UPN’s are like ‘[email protected]’ and your Example string is ‘[email protected]’
- Then it won’t use whatever value you put in the textbox because these values will ‘match’ because the ‘@companydomain.com’ is the same
- This can also occur for computer names. So make sure your example string doesn’t contain similar characters to your naming standards.

How do we utilize this in a Task Sequence? #
Lets use a powershell script to create the ‘OSDeploy.AutopilotOOBE.json’ file.
The script will:
- Set the configuration parameters you want.
- Creat the file ‘OSDeploy.AutopilotOOBE.json’ to “C:\ProgramData\OSDeploy\OSDeploy.AutopilotOOBE.json”
- Since we’ll be in WinPE, and this file needs to be on the Installed OS, I am hard coding ‘C:’ in the Path.
- Finally it will Convert the Hashtable TO json and write it to the above file.
<# https://MichaeltheAdmin.com

Create the file "C:\ProgramData\OSDeploy\OSDeploy.AutopilotOOBE.json"
and 'Start-AutopilotOOBE' will import the file

Working off the infromation here
https://autopilotoobe.osdeploy.com/

#>

# Set OSDCloudGUI Defaults
$Global:AutopilotOOBE = [ordered]@{
    Title           = 'Michael the Admin - Autopilot Registration'
    GroupTag        = 'MTA-USALPT'
    GroupTagOptions = @(
        'MTA-USALPT',
        'MTA-USAWRK'
    )
    AssignedUserExample         = "[email protected]"
    AssignedComputerNameExample = 'ExampleComputerName'
    Hidden = 'AddToGroup'
    Assign = $true
    PostAction = 'Restart'
    Docs = 'https://michaeltheadmin.com'
}

# Create 'OSDeploy.AutopilotOOBE.json' - This needs to be written to the 'C:' drive
$AutopilotOOBEjson = New-Item -Path "C:\ProgramData\OSDeploy\OSDeploy.AutopilotOOBE.json" -Force

# Covert data to Json and export to the file created above
$Global:AutopilotOOBE | ConvertTo-Json -Depth 10 | Out-File -FilePath $($AutopilotOOBEjson.FullName) -Force
Download Script
Add this to your Task Sequence #
Download the Full Task Sequence
- OSDCloudGUI_Settings_Updates-AutopilotOOBE-Default.zip
- OSDCloudGUI_Settings_Updates-AutopilotOOBE-Default.zip
- Add a ‘Run PowerShell Script’ step
- This step needs to be after the ‘Start-OSDCloudGUI’ step
- This is because the file needs to be created within the new OS
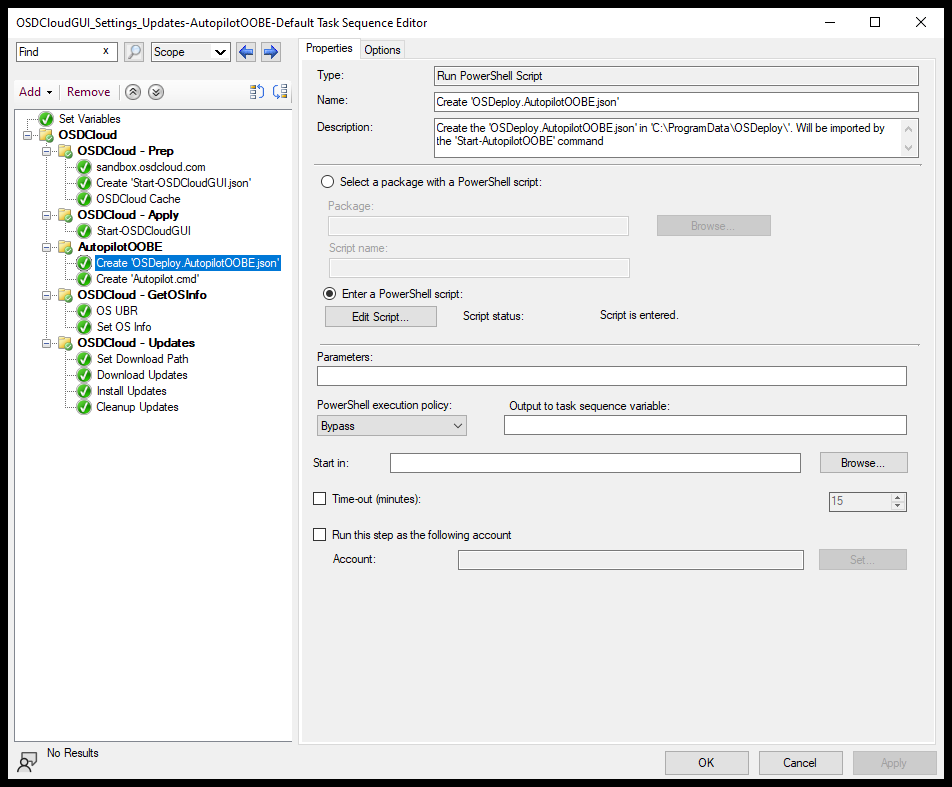
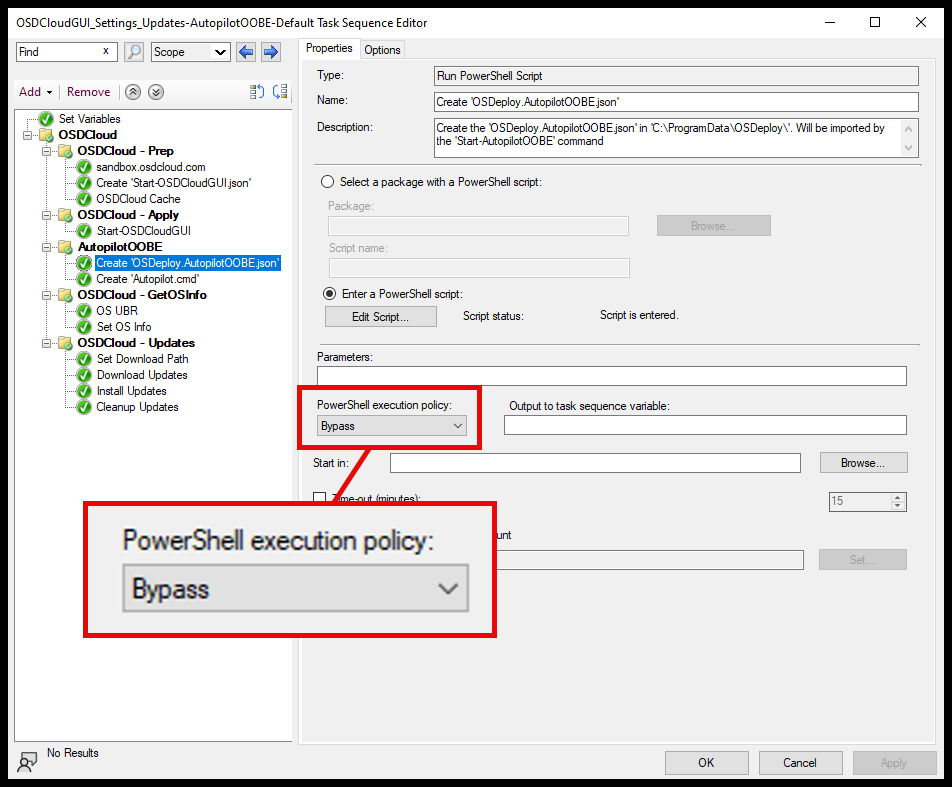
- Set the Execution Policy to Bypass
- Select ‘Enter PowerShell script:’
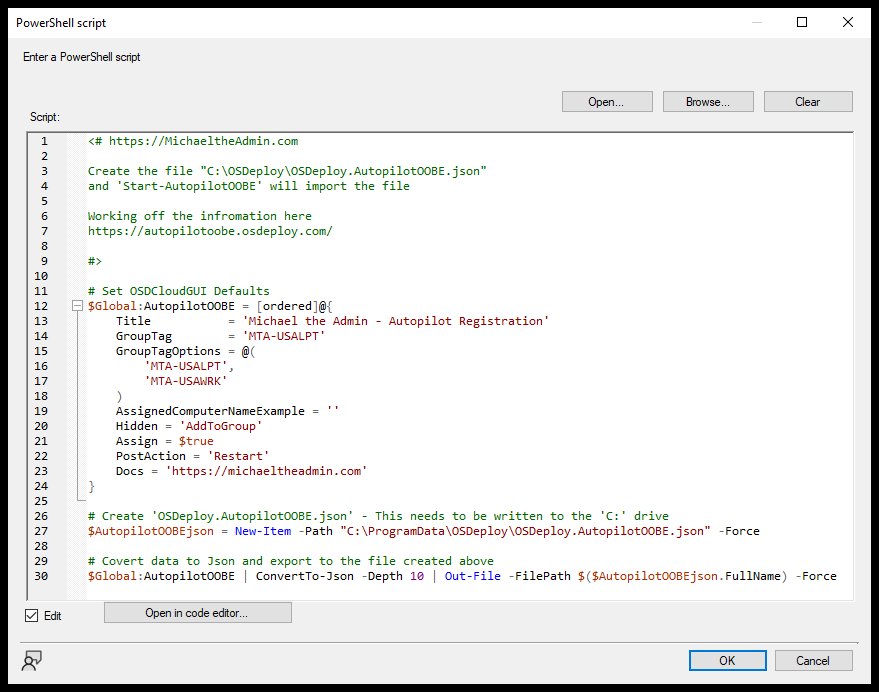
- Then select ‘Edit Script…’
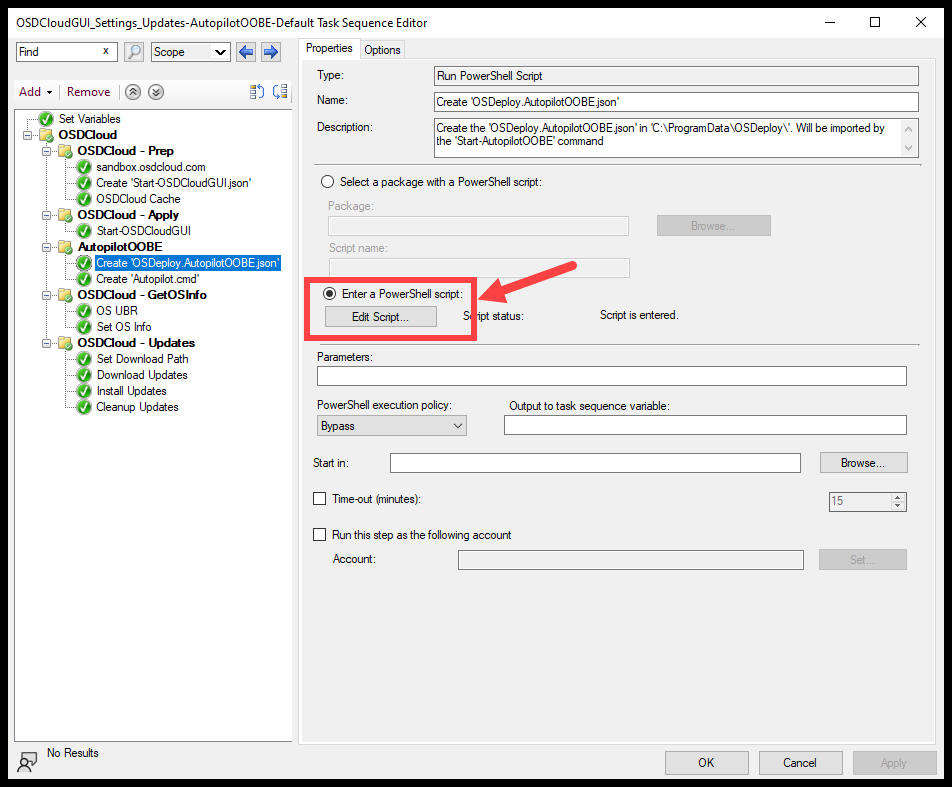
- Paste the script into the prompt, and select ‘OK’
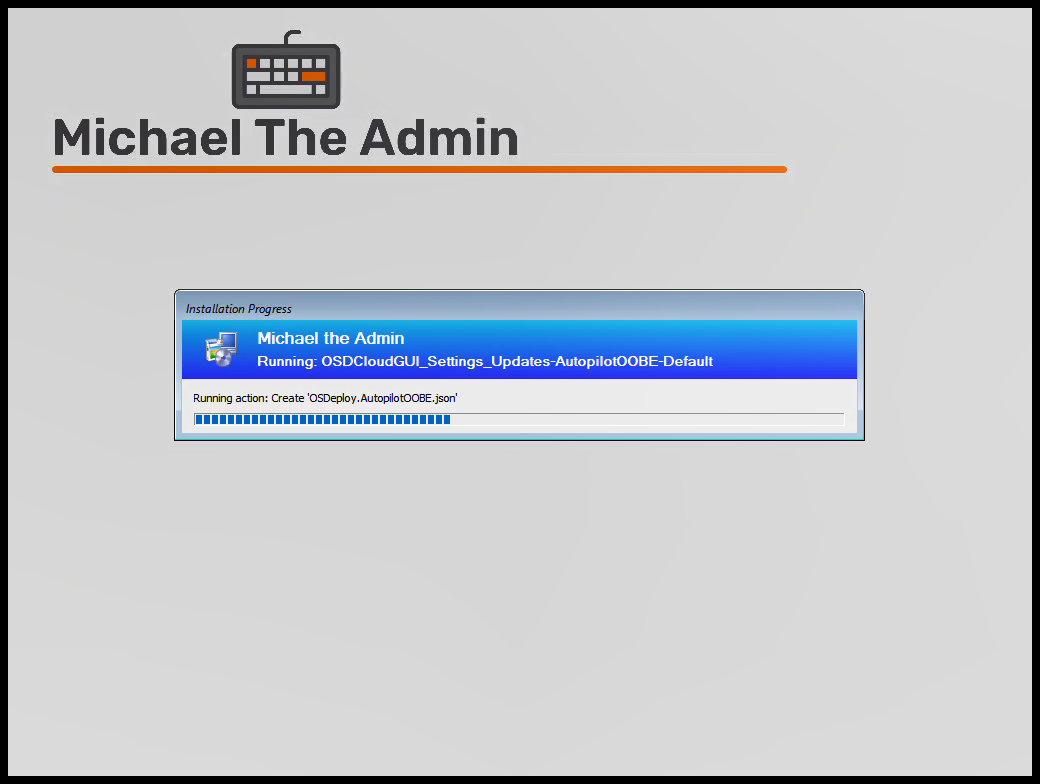
Run the Task Sequence #
You should see the step run after the ‘Start-OSDCloudGUI’ step
Now when you run ‘Start-AutopilotOOBE’ you’ll notice the Configuration Json being imported
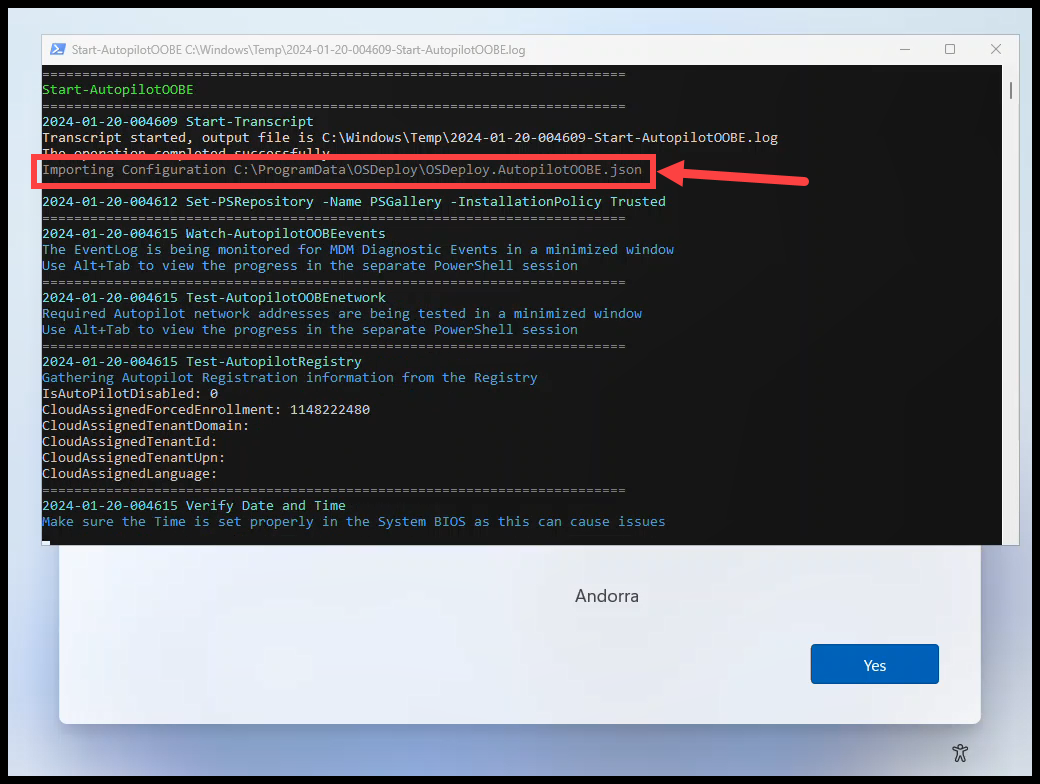
And once the GUI loads, our configurations should be set.
Success! #
Even more ways to save time and limit mistakes.