

I recently posted how you can utilize ServiceUI with PSADT to make your Intune Win32app deployments interactive. Check out the post below:

This is required for PSADT packages created with version 4.0.x or lower. While using ServiceUI works, it is a HUGE security concern as it can give SYSTEM level access to someone that should only be standard user.
But with PSADT version 4.1, we will no longer need to utilize ServiceUI 🙏. As of this post, version 4.1 is still in development and actively being worked on, so we’ll cover how to get the dev branch templates to test out.
PSADT 4.1 has been released as of August 7, 2025.
Additional Information #
Starting Information #
As I mentioned above, version 4.1 is still in development as of this post, so don’t run it in production. The PSADT team will get it out soon.
I’ll cover where the dev branch is and how to download the templates. Then we’ll package up Notepad++, create an Intune Win32app, and see how it installs.
Where is the Dev stuff? #
GitHub #
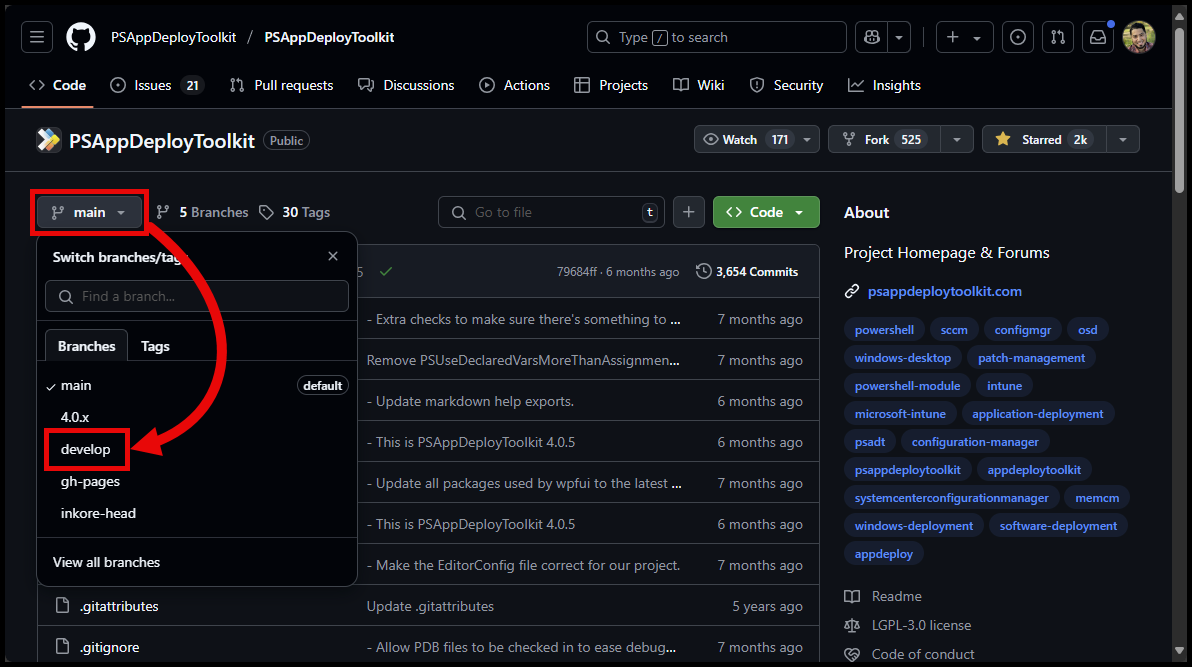
To start, where is the development version at? Navigate to the PSAppDeployToolkit GitHub page using the link below:
Switch Branches #
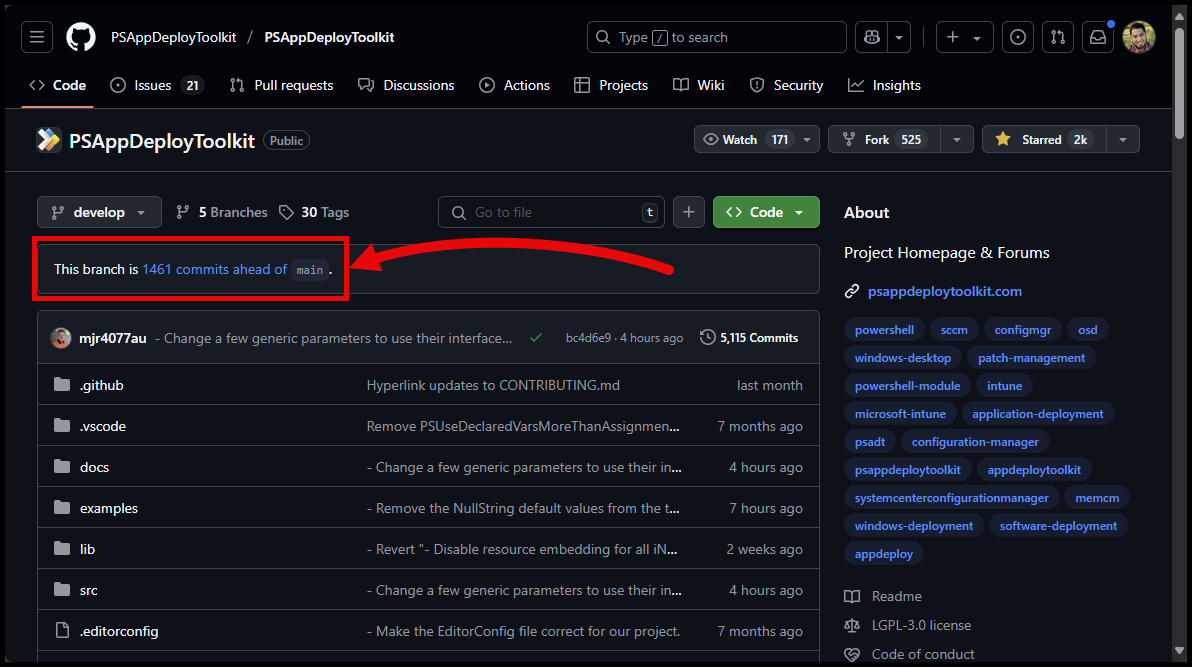
After launching the page, switch from the ‘main’ branch, to the ‘develop’ branch:
Actions #
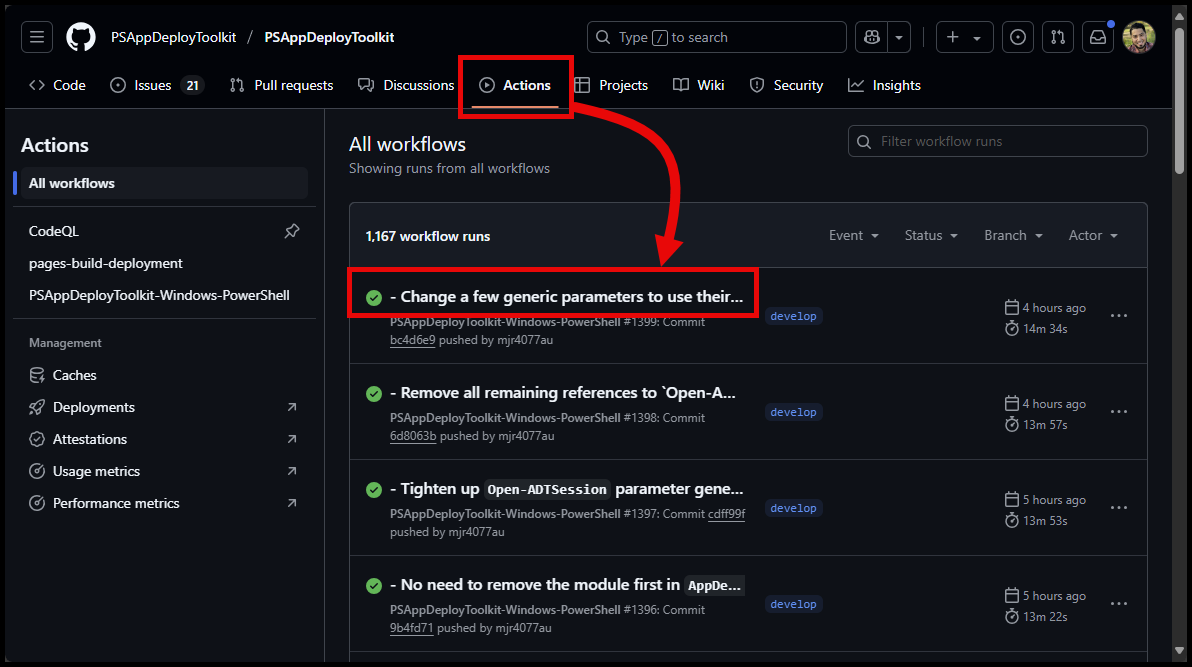
The templates are built by GitHub Actions Workflows and stored as Artifacts.
Start by selecting Actions at the top of the page –> then select the most recent workflow run:
Download #
From the workflow page –> Select either the ‘Name’ or download button for the PSAppDeployToolkit_Template_v4
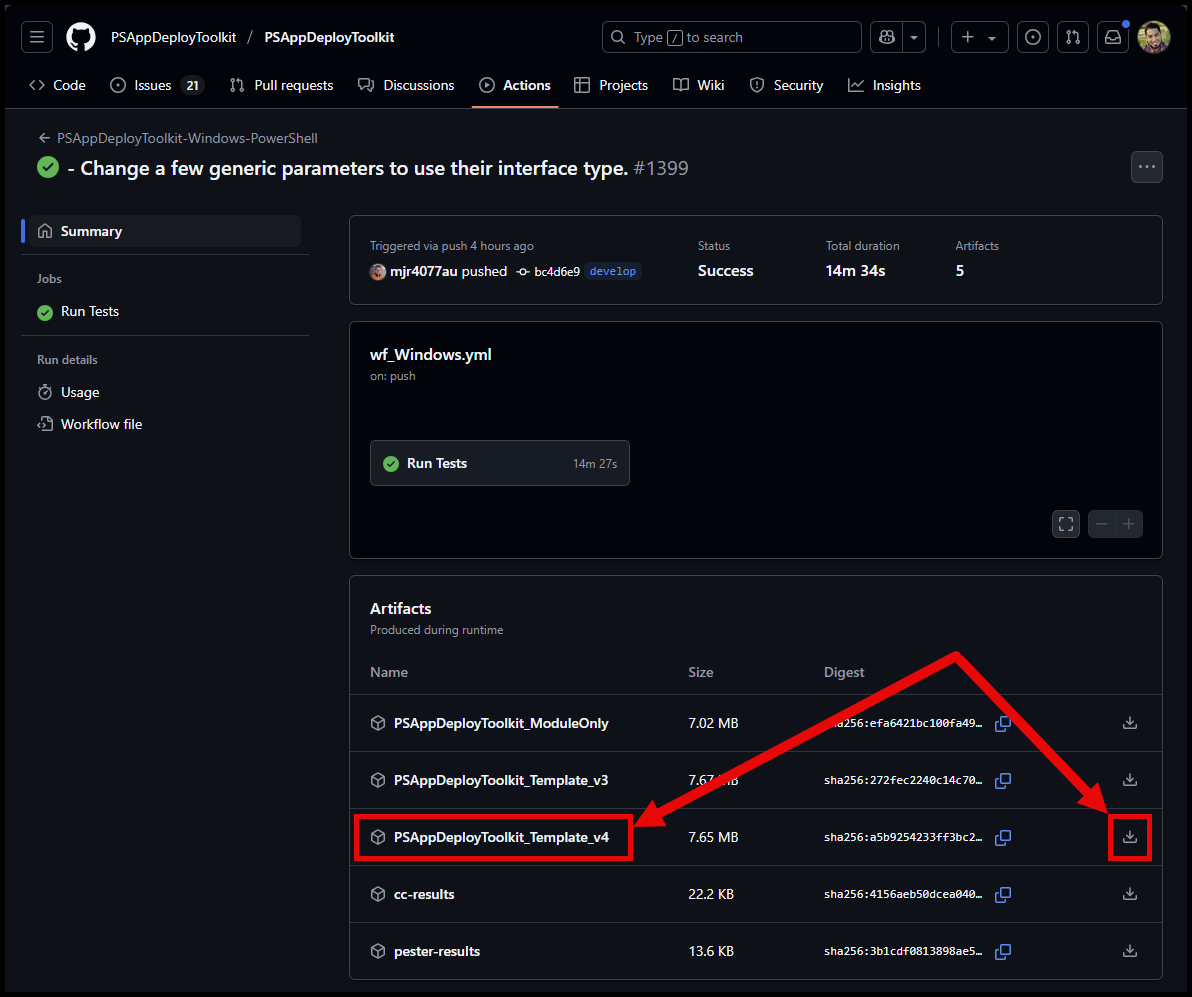
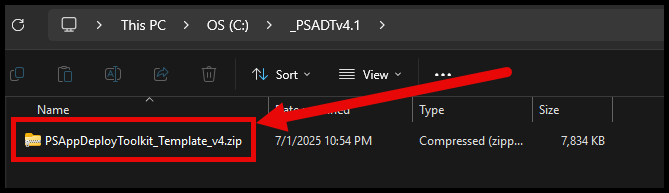
This will download a file named PSAppDeployToolkit_Template_v4.zip. I’ve saved mine to a new folder C:\_PSADTv4.1
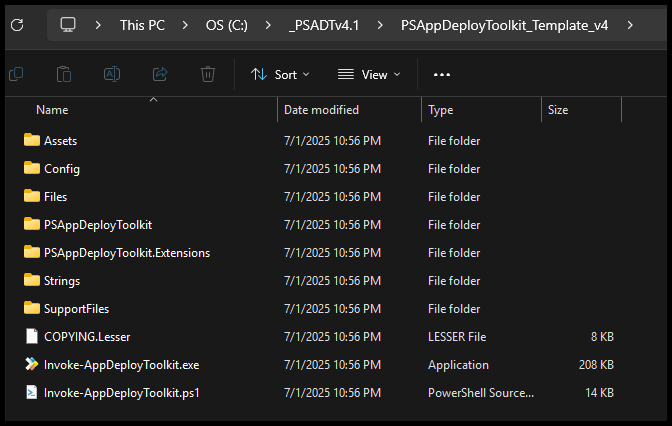
Extract #
And when you extract the zip file, you’ll get a familiar looking PSADT template:
Build a package #
Now that we have the template, lets put together a quick package using, you guessed it, Notepad++.
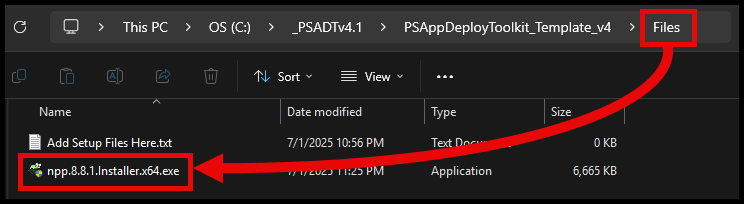
Files #
Download and save the installer file to the Files folder
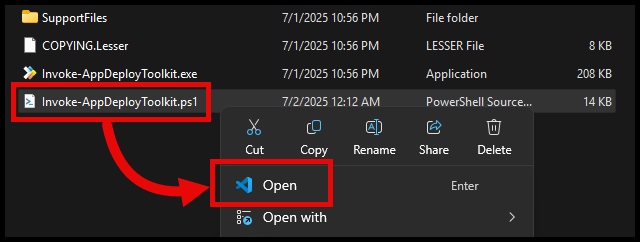
Invoke-AppDeployToolkit.ps1 #
Now lets edit the Invoke-AppDeployToolkit.ps1 script by opening it in your favorite IDE:
$adtSession #
Lets edit the App variables for the $adtSession. First thing I noticed was the AppProcessesToClose variable. This is specified here, and then dynamically added to each of the ‘Install’, ‘Uninstall’ and ‘Repair’ sections.
I modified it to only look for the ’notepad++’ process, using the below:
AppProcessesToClose = @(@{ Name = 'notepad++'; Description = 'Notepad++' })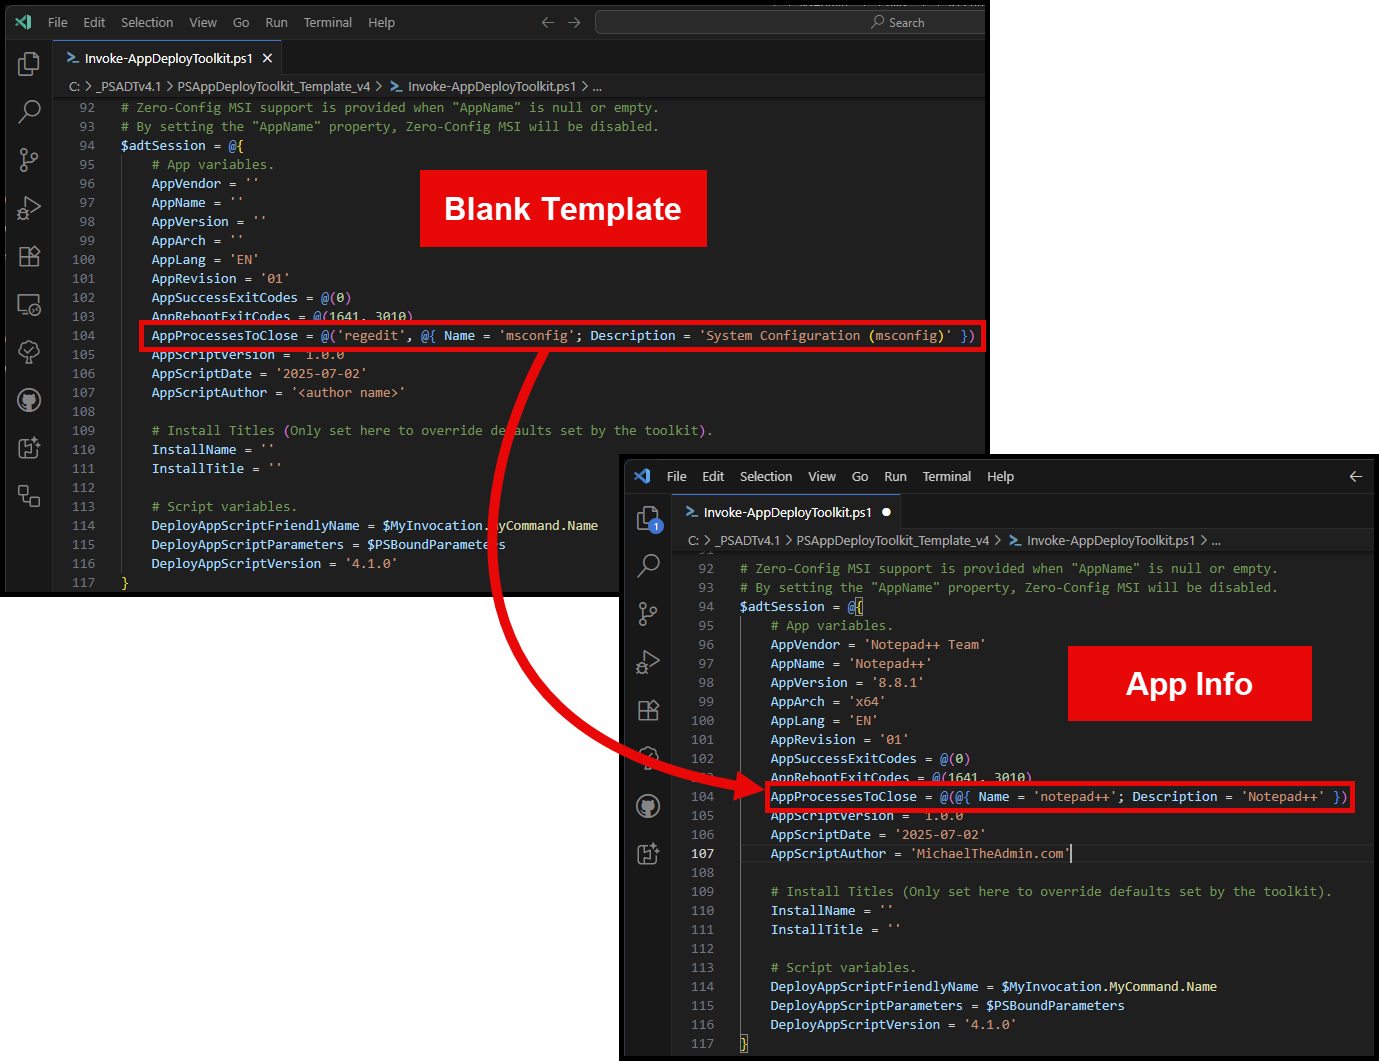
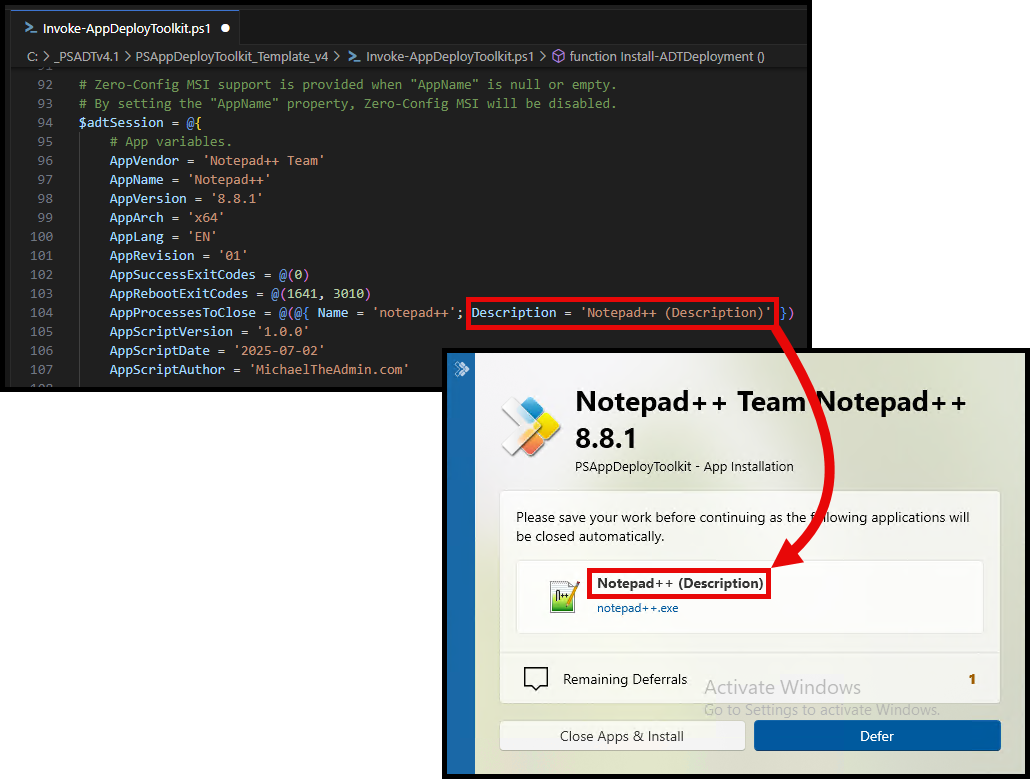
Use best coding practices and fill out the process details fully. The Description will ensure you get the correct name for it in the prompt. Example below:
AppProcessesToClose = @(@{ Name = 'notepad++'; Description = 'Notepad++' })
Pre-Install #
Show-ADTInstallationWelcome #
The setup for the Show-ADTInstallationWelcome function looks a bit different.
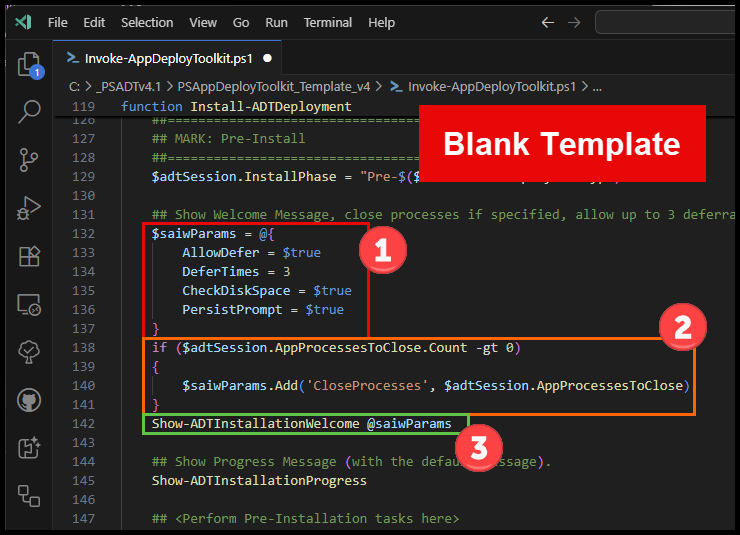
- Parameters are defined in a hash table
- Check if there are any defined processes to Close
- If the list is greater than 0, add the processes to the hash table
- Finally, pass all that information to the function
I like this setup. As I mentioned earlier, it’s nice being able to define the Processes at the top, and not having to set them for each deployment type section.
The only thing I’ve modified here is changing the AllowDefer to AllowDeferCloseProcess as I only want to give the user the option to defer if the application is currently running: Show-ADTInstallationWelcome · PSAppDeployToolkit

Install #
For this section, I’ve added the below command for a silent install.
Start-ADTProcess -FilePath 'npp.8.8.1.Installer.x64.exe' -ArgumentList '/S'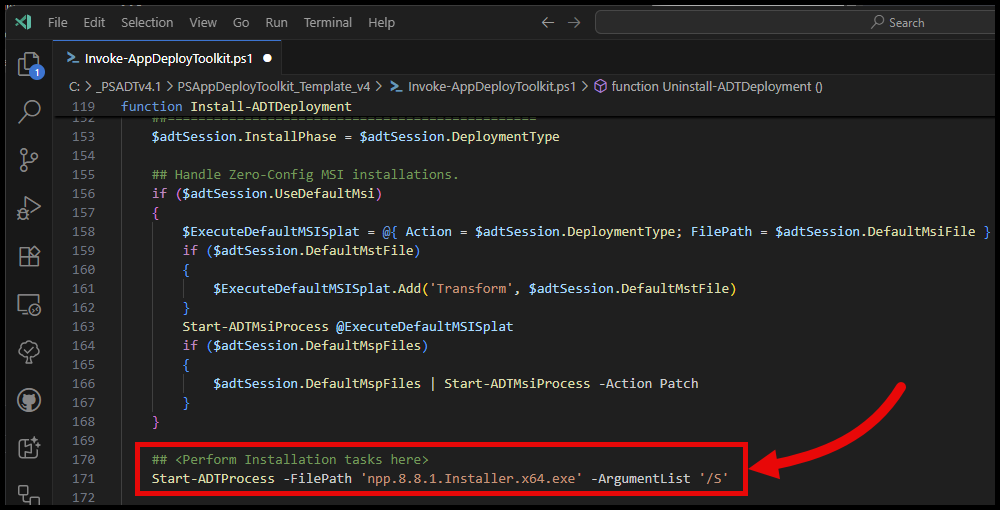
Uninstall #
Add for this section, I’ve added the below command for a silent uninstall
Start-ADTProcess -FilePath "$($envProgramFiles)\Notepad++\uninstall.exe" -ArgumentList '/S'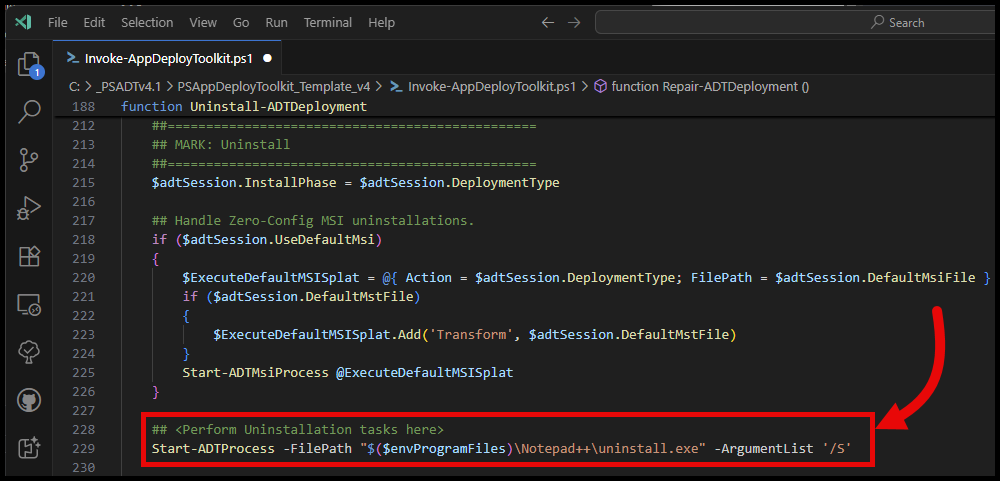
Create ‘intunewin’ file #
I’m using the ‘IntuneWin32App’ PSModule to create the intunewin file that we’ll upload into Intune. It’s just what I know and works great!
I opened up a PowerShell session in Terminal within the same folder as my PSADT v4.1 package folder, and ran the below command:
New-IntuneWin32AppPackage -SourceFolder .\PSAppDeployToolkit_Template_v4\ -SetupFile Invoke-AppDeployToolkit.exe -OutputFolder .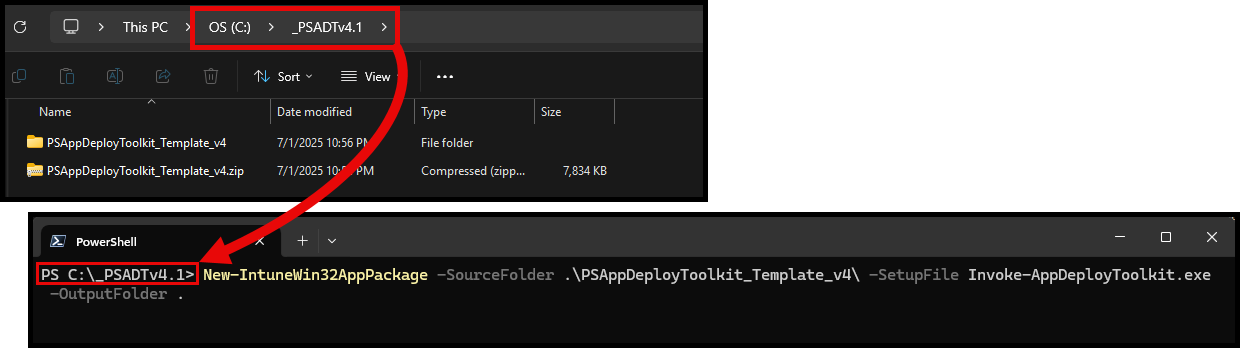
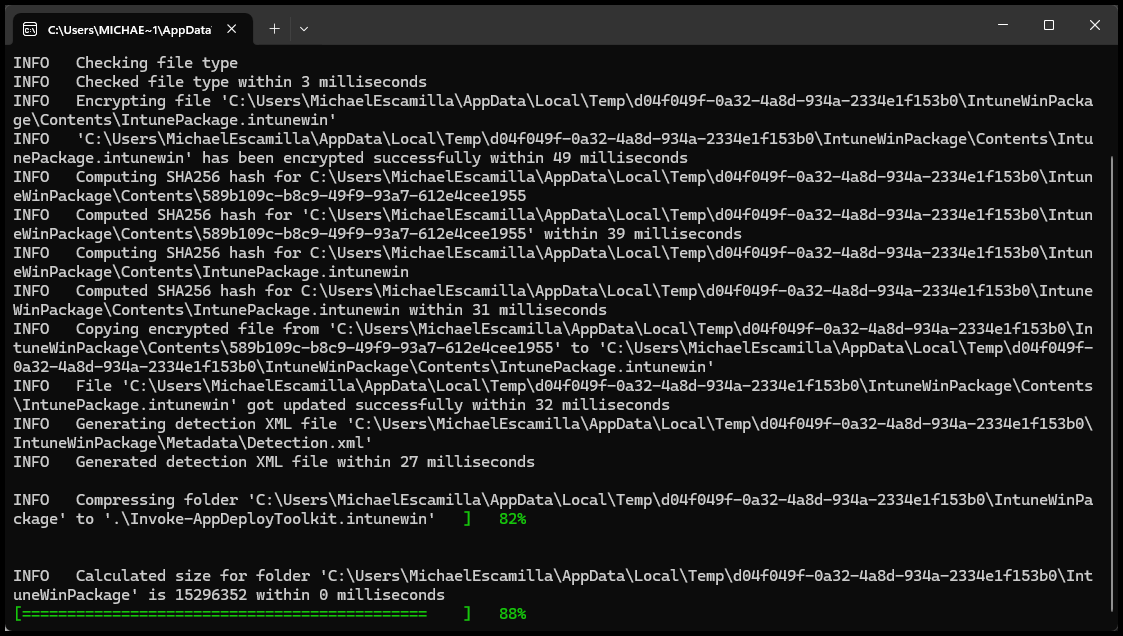
intunewin file being created
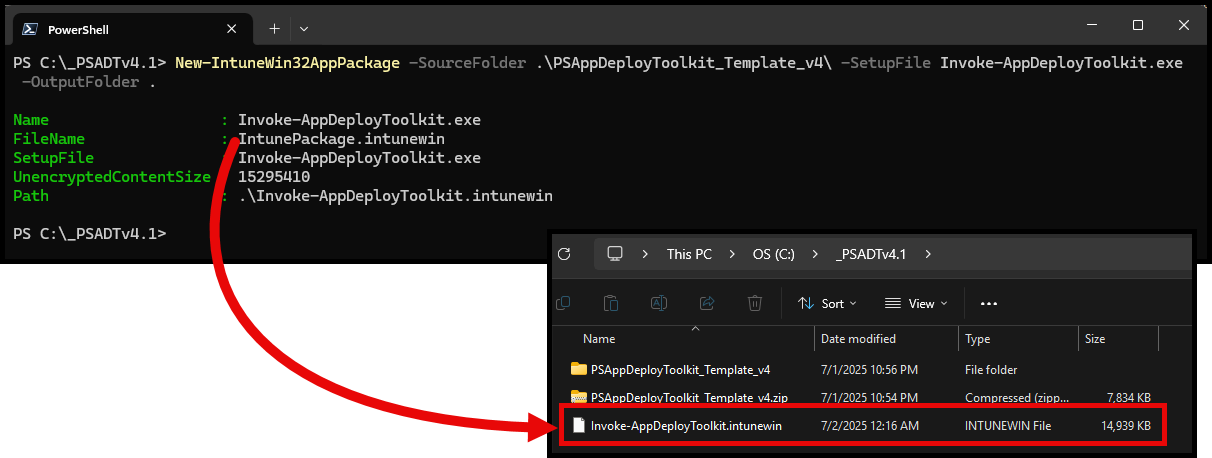
intunewin file in your folder
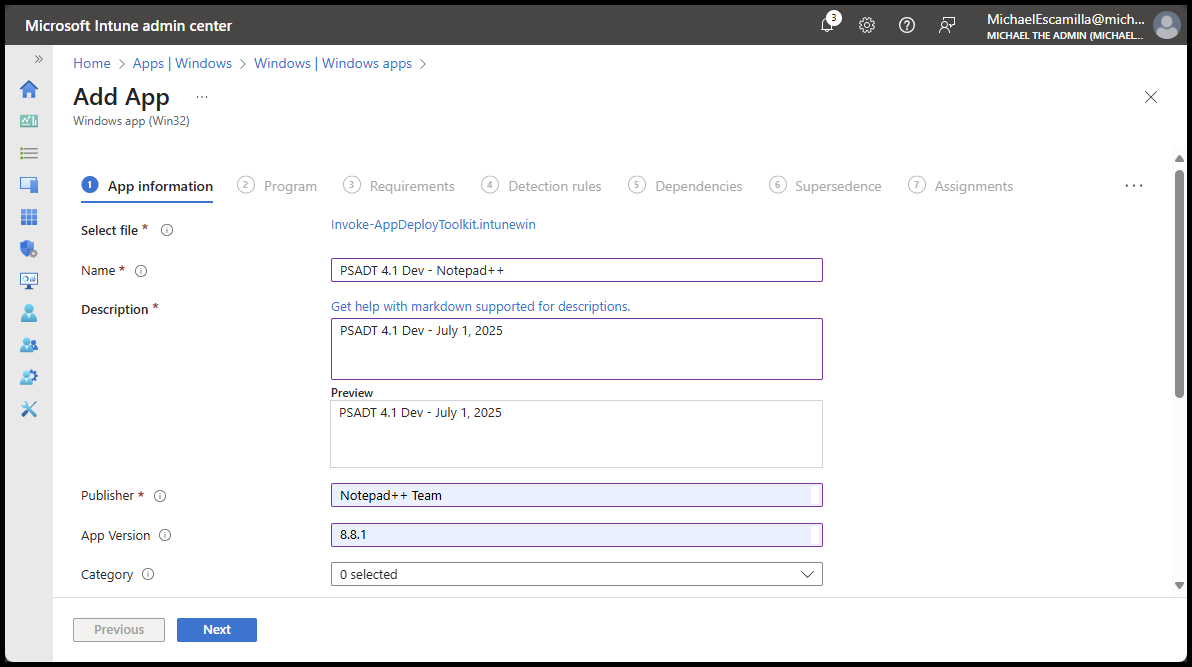
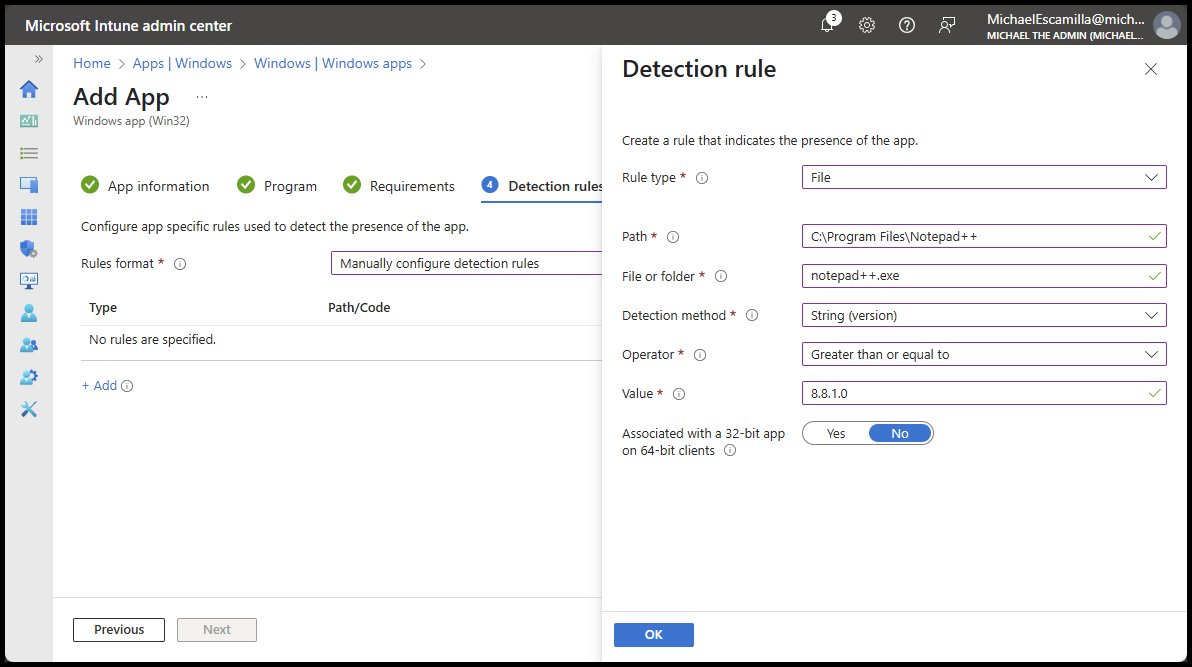
Create Intune Win32app #
I won’t go into great detail here, you know how to do this already…

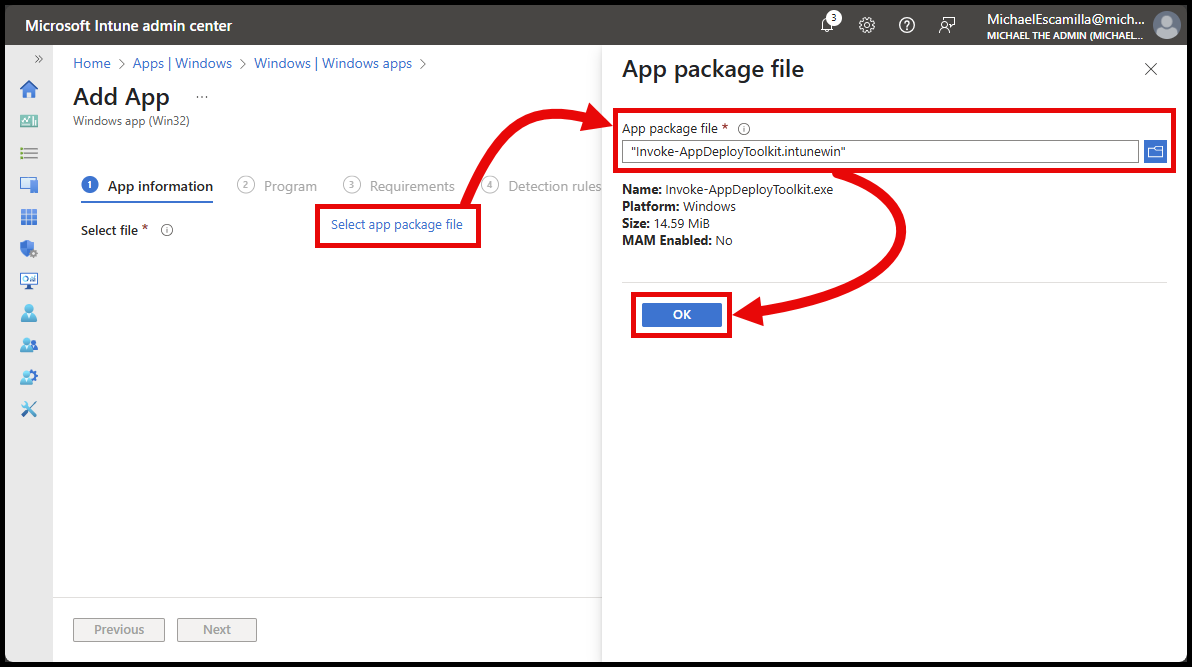
The important part I’ll point out is that I’m using the Invoke-AppDeployToolkit.exe for the install command. No ‘ServiceUI’!!!!
# Install command
Invoke-AppDeployToolkit.exe

# Uninstall command
Invoke-AppDeployToolkit.exe Uninstall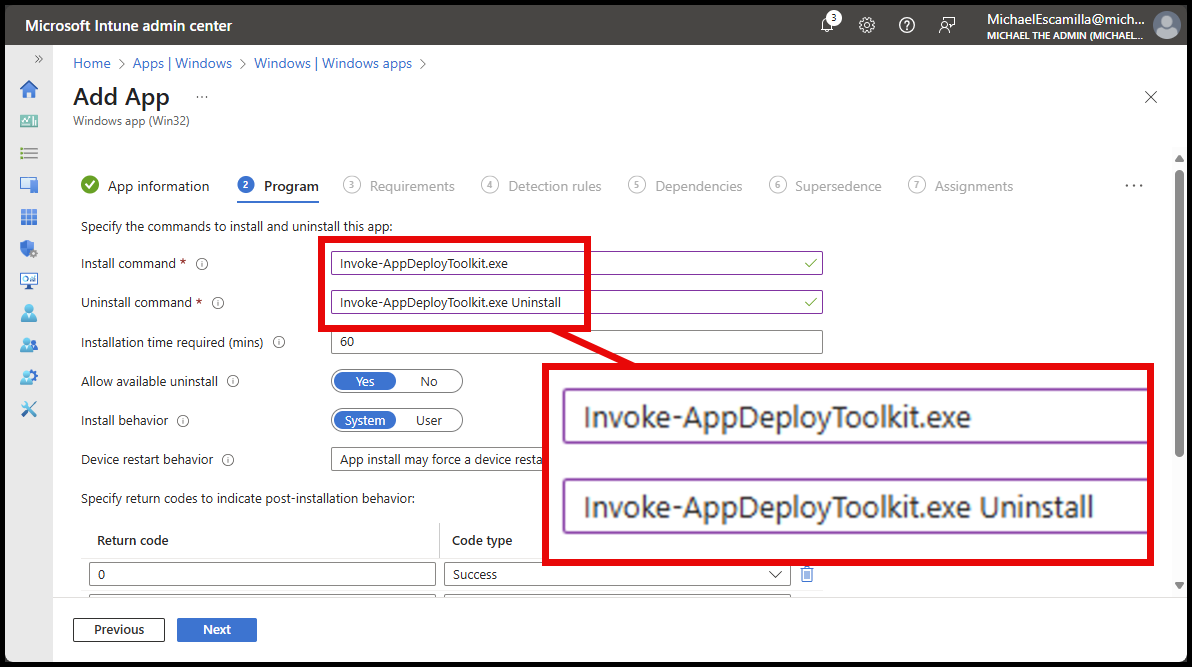
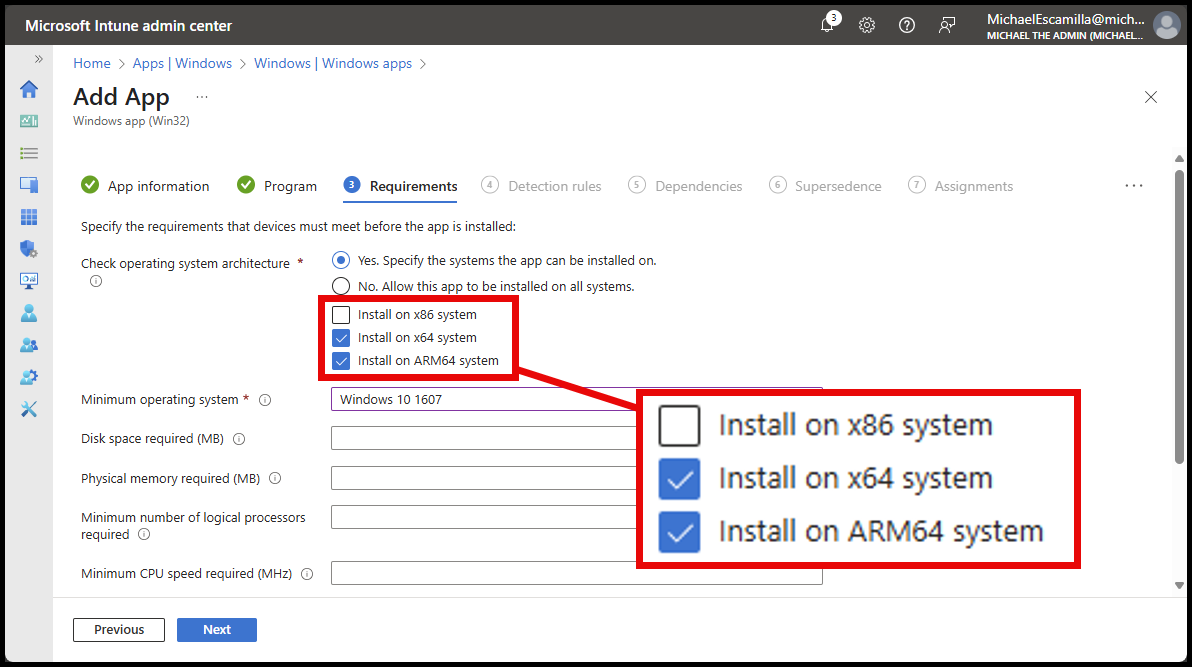
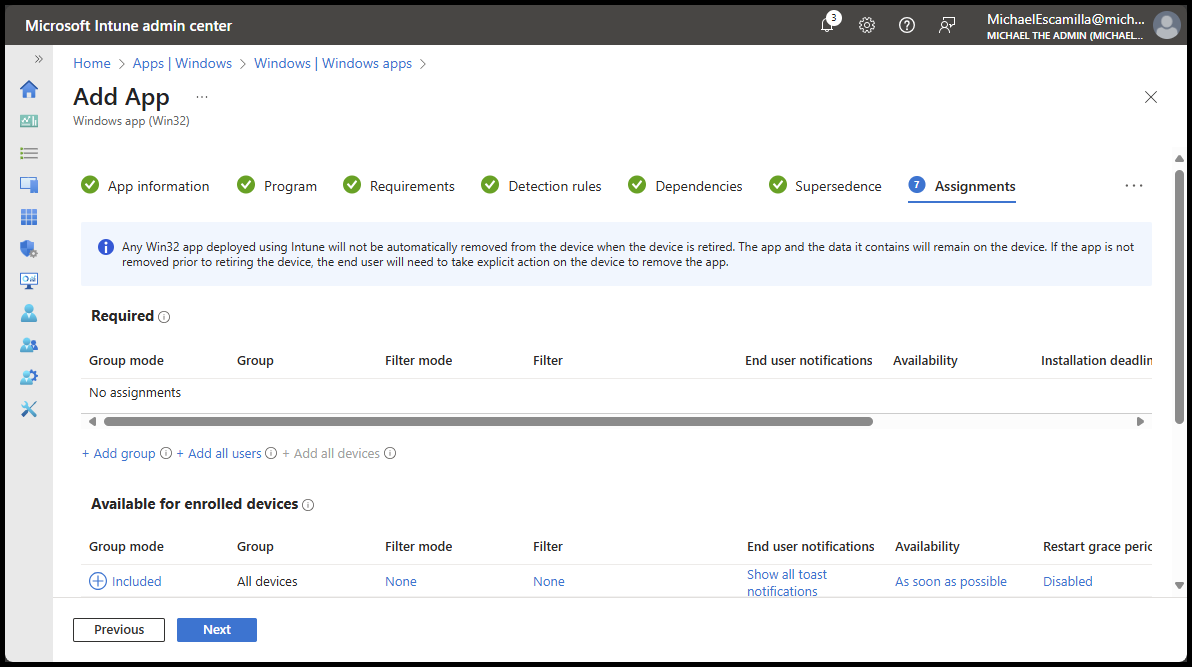
Ok, one more thing to point out. This is irrelevant to what we’re doing here, but just thought I’d highlight it, new OS Arch options!!!!!
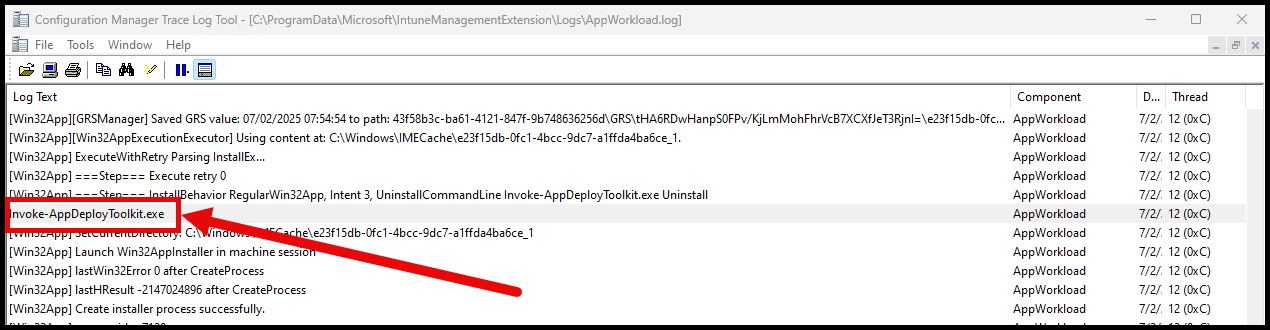
Does it Work!?! #
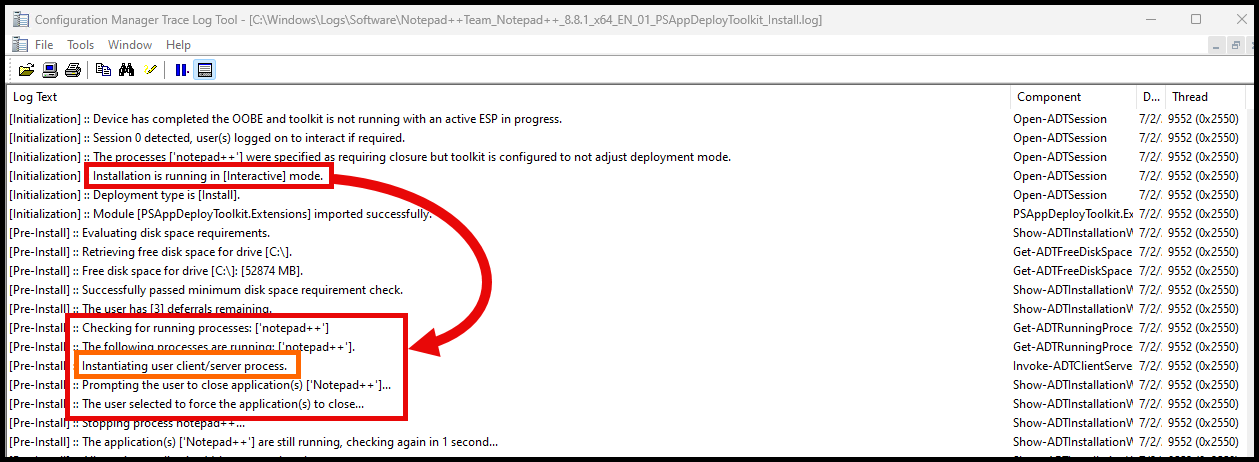
Yes! Looking at the logs we can see the PSADT package is being ran by the Invoke-AppDeployToolkit.exe without ServiceUI, and we are still getting the prompts to close the application and success status.
The AppWorkload.log shows the ‘Invoke-AppDeployToolkit.exe’ command:
And the PSADT Log shows it’s running as Interactive and that the user was prompted.
There is a bit here about Instantiating user client/server process that I haven’t had time to fully understand yet. But maybe that’s another post for another day.
Conclusion #
PSAppDeployToolkit v4.0 brought some great changes, and v4.1 is only making things better. Not having to use ServiceUI is a game changer from setup and security perspectives.
What do you think? Are you moving your deployments to version 4.1 once it’s released?