
Now that it’s actually widely available, I figured it’s time to take a look at the new PowerShell Script Installer option for Win32 Apps in Intune and learn how it works.
There are some posts already out there that cover the feature and I encourage you to go check them out:
- PowerShell Script Installer Support for Win32 apps in Intune - Patch My PC
- Getting started with the PowerShell script installer for Win32 apps
What is the PowerShell Script Installer for Win32 Apps? #
This new feature allows you to utilize a PowerShell script as the installer or uninstaller for your Win32 app, instead of a normal ‘command line’.
This is great for a few reasons:
- All the installation logic is now handled by this PowerShell script. Make it as simple as my example above, or as complex as your installation requires (think PSADT style stuff).
- As Rudy points out in his blog post, the
PowerShell Scriptdoes not need to be part of the Win32 app package itself, it is part of the metadata of the app now.
Why use the PowerShell Script Installer option? #
New Win32 Apps #
If you are creating a new Win32 app in Intune, you no longer need to include your installation script inside the package. Store and manage the install and uninstall script separate from the Install Files of the package.
Command Line option #
With the command line option, if you want to use a PowerShell script to install, you need to:
- Include the script file in the package
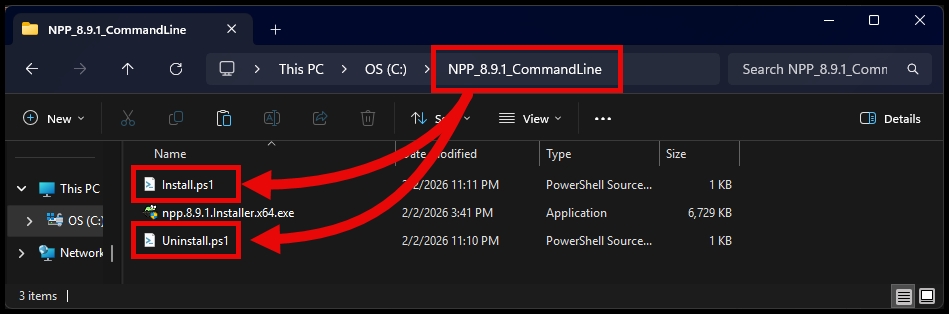
- Then use the below command line to call
powershell.exeand point to the scripts inside the package
%SystemRoot%\System32\WindowsPowerShell\v1.0\PowerShell.exe -ExecutionPolicy Bypass -NoProfile -File Install.ps1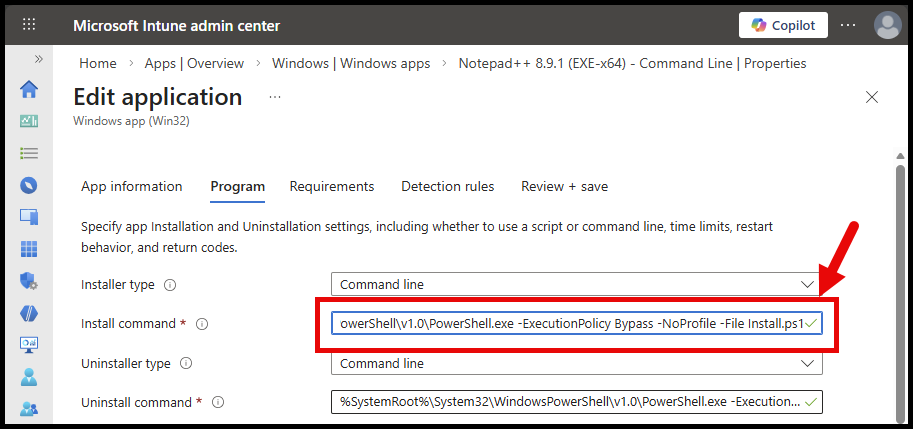
Downsides to this approach is if you need to update the install or uninstall script, you need to repackage the entire Win32 app again and upload that to Intune.
This is inefficient and if you are working with a large application package like something from Autodesk, could take a long time to upload again.
PowerShell Script Installer option #
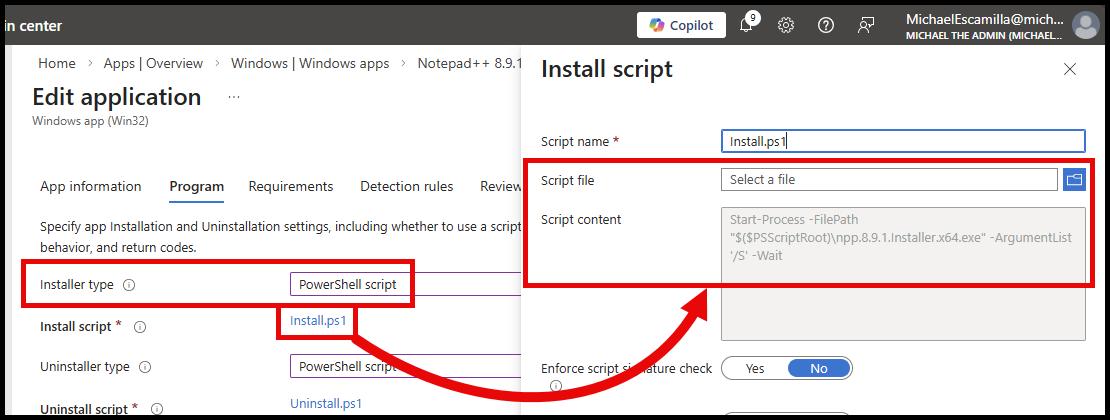
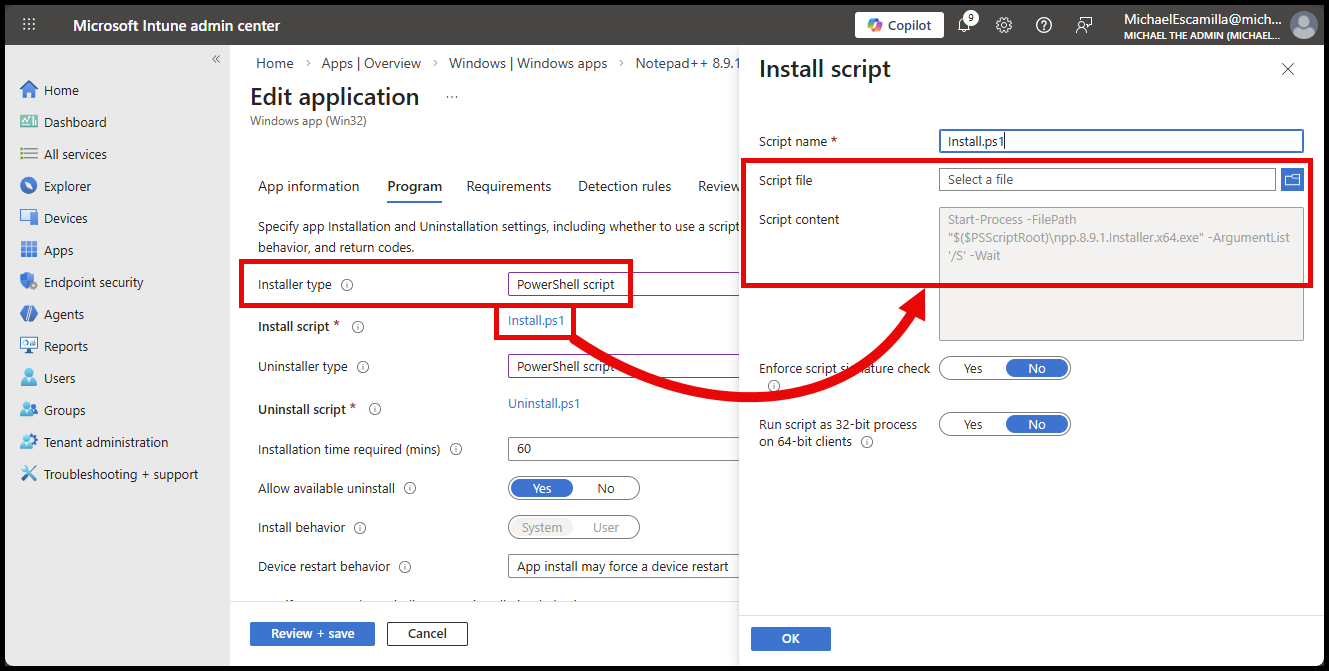
Now with the PowerShell Script Installer option:
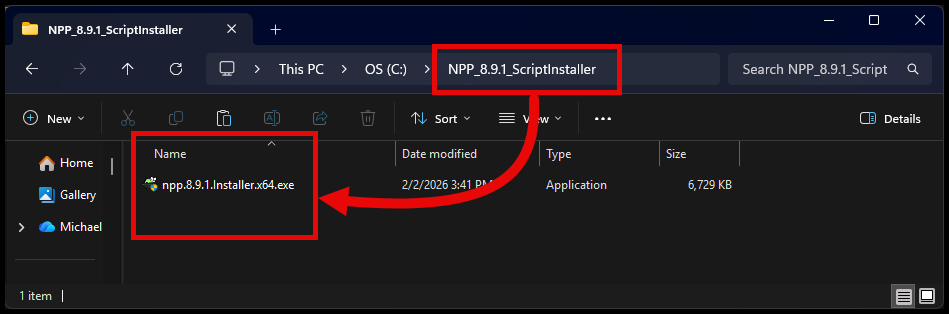
- Only the installation files are required to be in the package:
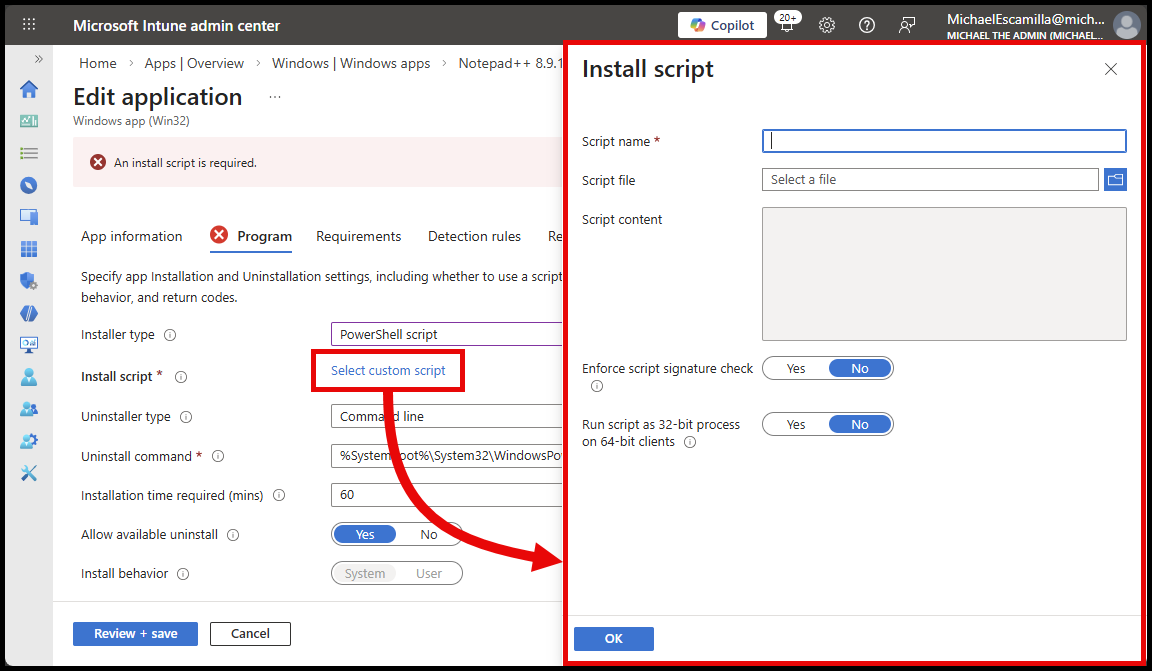
- And the Install and Uninstall scripts are uploaded into the app within the Intune portal:
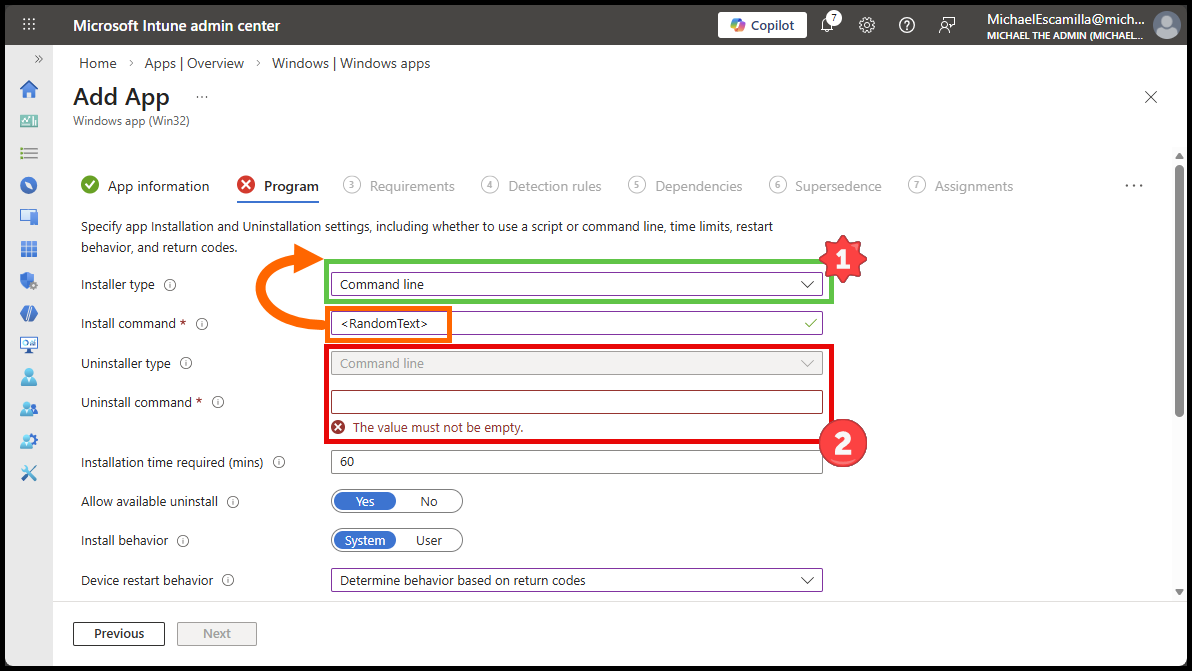
As of this post, there is a quirky behavior in the Intune portal:
When creating a new Win32 app, the Installer Type dropdown will be greyed out, until you enter some text into the Install command box
- In my below example:
- You can see that after I entered
<RandomText>into theInstall commandbox, and theInstaller Typedropdown became available. - Otherwise it will look like the Uninstall field below, where the
Installer Typedropdown is greyed out.
- You can see that after I entered
Existing Win32 Apps #
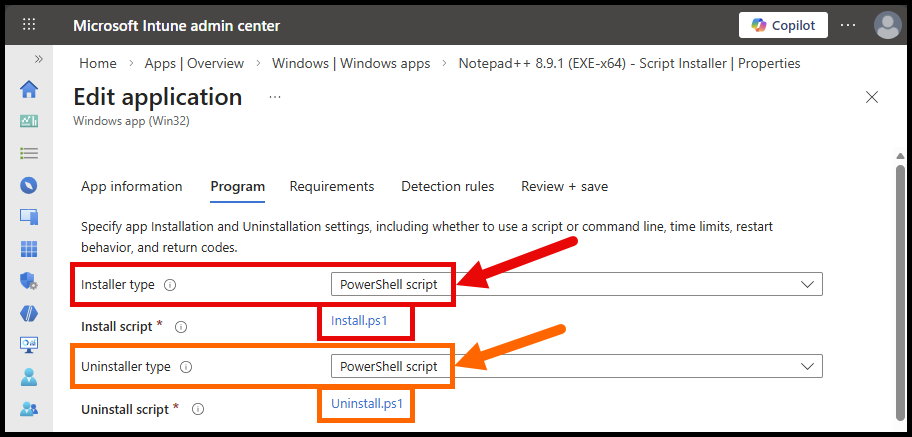
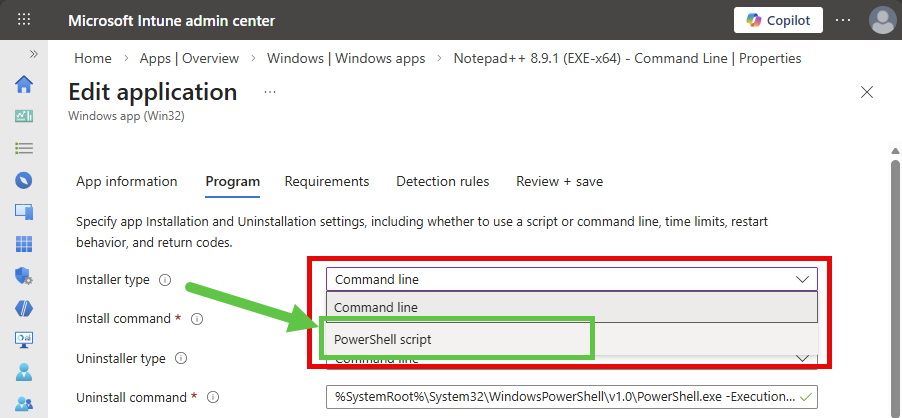
For any existing Win32 apps that you have already created in Intune, if you need to make any changes to the install or uninstall script, you can now switch the Installer type to PowerShell script and upload a new PowerShell script directly in Intune without needing to repackage and reupload the entire Win32 app package.
- Switch the Installer type to
PowerShell scriptin the dropdown box
- Upload your new PowerShell install and uninstall scripts
Graph API View #
You can query the Graph API and see the Installer Scripts for the Win32 app. Visible now is the activeInstallScript and activeUninstallScript properties that contain the microsoft.graph.win32LobAppInstallPowerShellScript id for the scripts:
Invoke-MgGraphRequest -Method GET -Uri "https://graph.microsoft.com/beta/deviceAppManagement/mobileApps/{c77e67fa-a460-490d-a0d8-5c7db4ead143}" | Select id, displayName, activeInstallScript, activeUninstallScript | FL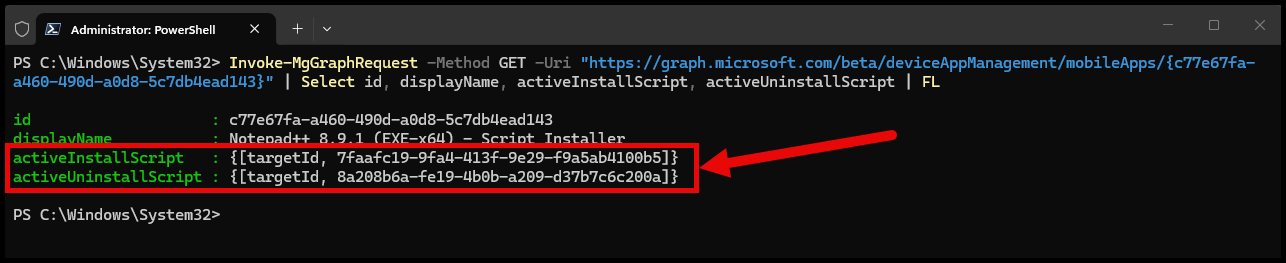
Then you can then query the scripts information. The Content property will show null unless you specifically select that property:
Invoke-MgGraphRequest -Method GET -Uri "https://graph.microsoft.com/beta/deviceAppManagement/mobileApps/{c77e67fa-a460-490d-a0d8-5c7db4ead143}/microsoft.graph.win32LobApp/contentVersions/1/scripts" | ConvertTo-Json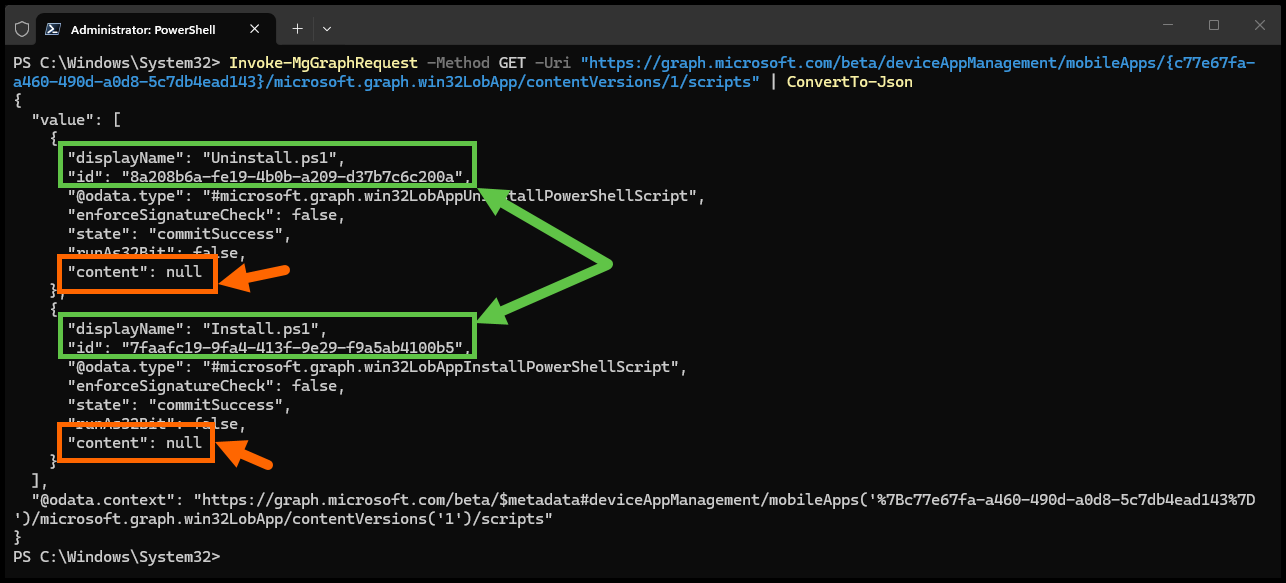
Selecting that property will show the scripts content. The scripts are stored as base64 encoded content. Below is the install.ps1 script for my application:
Invoke-MgGraphRequest -Method GET -Uri "https://graph.microsoft.com/beta/deviceAppManagement/mobileApps/{c77e67fa-a460-490d-a0d8-5c7db4ead143}/microsoft.graph.win32LobApp/contentVersions/1/scripts/{7faafc19-9fa4-413f-9e29-f9a5ab4100b5}?select=id,displayname,content" | ConvertTo-Json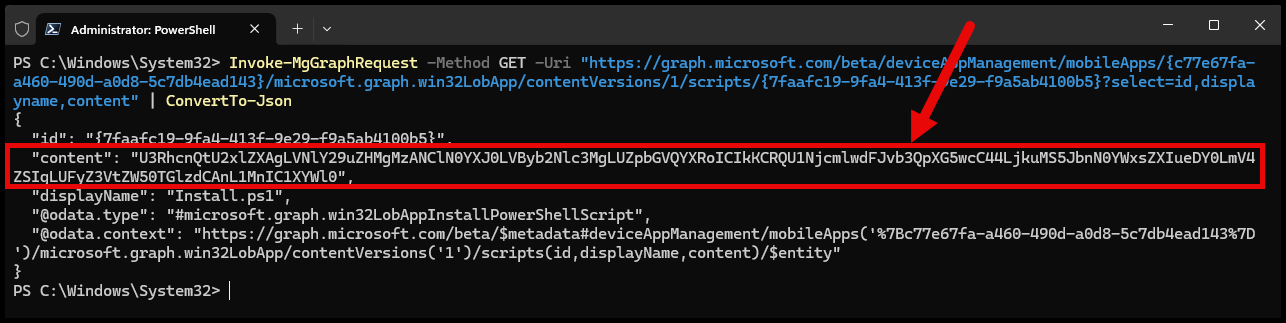
And decoding the content allows you to see the PowerShell script:
[System.Text.Encoding]::UTF8.GetString([System.Convert]::FromBase64String("U3RhcnQtU2xlZXAgLVNlY29uZHMgMzANClN0YXJ0LVByb2Nlc3MgLUZpbGVQYXRoICIkKCRQU1NjcmlwdFJvb3QpXG5wcC44LjkuMS5JbnN0YWxsZXIueDY0LmV4ZSIgLUFyZ3VtZW50TGlzdCAnL1MnIC1XYWl0"))
How does this work on the client side? #
What is actually happening on the client side when using this new PowerShell Script Installer option is used?
Let’s start an install…
Get policies #
The policy for the Win32 app is delivered to the client just like any other Win32 app.
If you didn’t know, you can see the app policies being received by the client in the AppWorkload.log by search for a line that starts with ‘Get policies’:
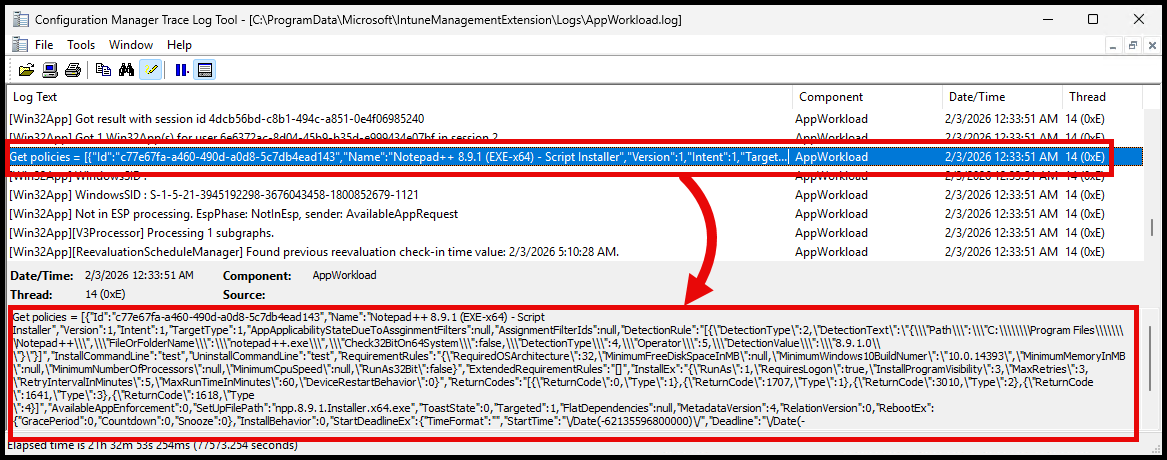
If you take a look at the policy payload, you’ll see a couple of things:
- The
InstallCommandLineandUninstallCommandLineare still set. In this example, I originally created the app withtestas a placeholder until I could edit the Installer type. - There is a
Scriptsproperty that contains install and uninstall script IDs in a JSON format.
[
    {
        "Id": "c77e67fa-a460-490d-a0d8-5c7db4ead143",
        "Name": "Notepad++ 8.9.1 (EXE-x64) - Script Installer",
        "Version": 1,
        "Intent": 1,
        "TargetType": 1,
        "AppApplicabilityStateDueToAssginmentFilters": null,
        "AssignmentFilterIds": null,
        "DetectionRule": "[{\"DetectionType\":2,\"DetectionText\":\"{\\\"Path\\\":\\\"C:\\\\\\\\Program Files\\\\\\\\Notepad++\\\",\\\"FileOrFolderName\\\":\\\"notepad++.exe\\\",\\\"Check32BitOn64System\\\":false,\\\"DetectionType\\\":4,\\\"Operator\\\":5,\\\"DetectionValue\\\":\\\"8.9.1.0\\\"}\"}]",
        "InstallCommandLine": "test",
        "UninstallCommandLine": "test",
        "RequirementRules": "{\"RequiredOSArchitecture\":32,\"MinimumFreeDiskSpaceInMB\":null,\"MinimumWindows10BuildNumer\":\"10.0.14393\",\"MinimumMemoryInMB\":null,\"MinimumNumberOfProcessors\":null,\"MinimumCpuSpeed\":null,\"RunAs32Bit\":false}",
        "ExtendedRequirementRules": "[]",
        "InstallEx": "{\"RunAs\":1,\"RequiresLogon\":true,\"InstallProgramVisibility\":3,\"MaxRetries\":3,\"RetryIntervalInMinutes\":5,\"MaxRunTimeInMinutes\":60,\"DeviceRestartBehavior\":0}",
        "ReturnCodes": "[{\"ReturnCode\":0,\"Type\":1},{\"ReturnCode\":1707,\"Type\":1},{\"ReturnCode\":3010,\"Type\":2},{\"ReturnCode\":1641,\"Type\":3},{\"ReturnCode\":1618,\"Type\":4}]",
        "AvailableAppEnforcement": 0,
        "SetUpFilePath": "npp.8.9.1.Installer.x64.exe",
        "ToastState": 0,
        "Targeted": 1,
        "FlatDependencies": null,
        "MetadataVersion": 4,
        "RelationVersion": 0,
        "RebootEx": {
            "GracePeriod": 0,
            "Countdown": 0,
            "Snooze": 0
        },
        "InstallBehavior": 0,
        "StartDeadlineEx": {
            "TimeFormat": "",
            "StartTime": "/Date(-62135596800000)/",
            "Deadline": "/Date(-62135596800000)/"
        },
        "RemoveUserData": false,
        "DOPriority": 1,
        "newFlatDependencies": true,
        "AssignmentFilterIdToEvalStateMap": null,
        "ContentCacheDuration": null,
        "ESPConfiguration": null,
        "ReevaluationInterval": 480,
        "SupportState": null,
        "InstallContext": 1,
        "InstallerData": null,
        "AvailableAppRequestType": 0,
        "ContentMode": 1,
        "Scripts": "[{\"Id\":\"8a208b6a-fe19-4b0b-a209-d37b7c6c200a\",\"Type\":2,\"Data\":null,\"EnforceSignatureCheck\":false},{\"Id\":\"7faafc19-9fa4-413f-9e29-f9a5ab4100b5\",\"Type\":1,\"Data\":null,\"EnforceSignatureCheck\":false}]"
    }
]
The Scripts property contains two records, one for the install script and one for the uninstall script.
- Type
- 1 = Install Script
- 2 = Uninstall Script
[
    {
        "Id": "8a208b6a-fe19-4b0b-a209-d37b7c6c200a",
        "Type": 2,
        "Data": null,
        "EnforceSignatureCheck": false
    },
    {
        "Id": "7faafc19-9fa4-413f-9e29-f9a5ab4100b5",
        "Type": 1,
        "Data": null,
        "EnforceSignatureCheck": false
    }
]
Download content #
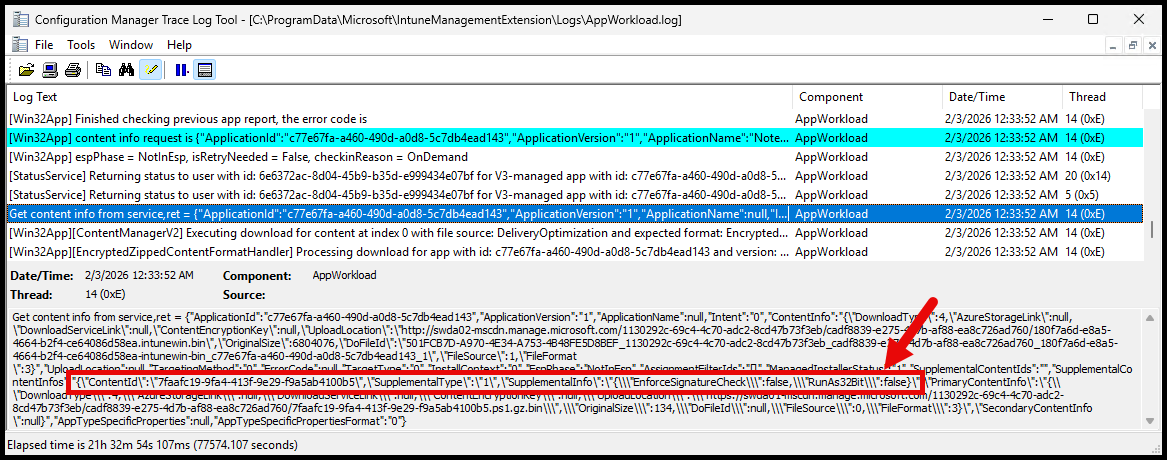
The Win32 app content is downloaded the same way, except an added step to download either the install or uninstall script is added.
You’ll see some ‘content info’ requests that include the script IDs:
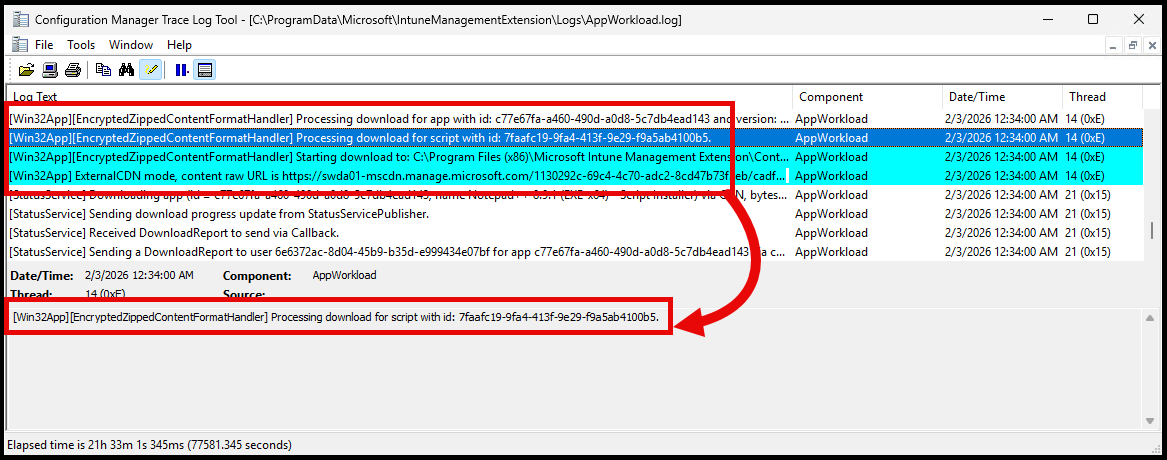
You see the lines where the app and also the ‘script’ is downloaded:
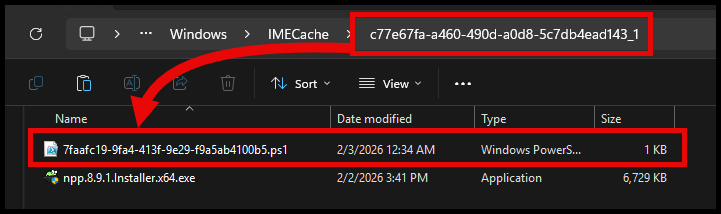
And the compressed script file is extracted to the IMECache folder inside the app content folder:
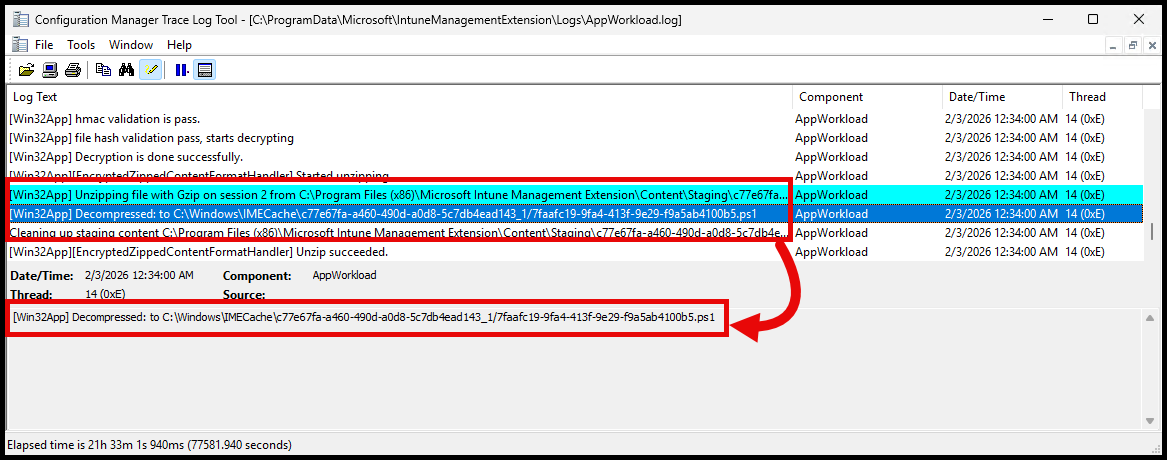
If you navigate to the IMECache folder, you’ll see the extracted PowerShell script file inside the app content folder:
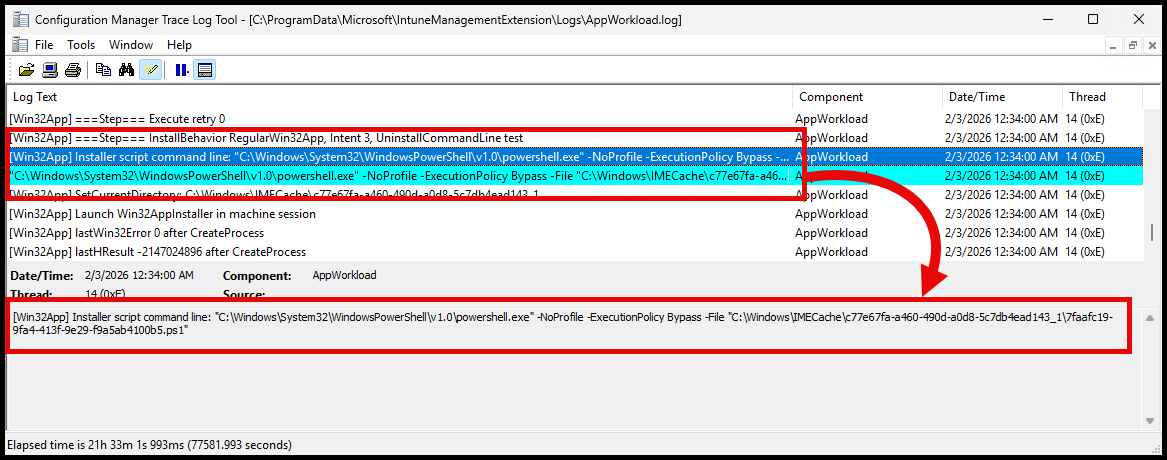
Install #
After the script is extracted, the installation is started by calling the PowerShell script from the IMECache app content folder.:
Conclusion #
I think this is a welcome addition to the Win32 app capabilities in Intune. It gives admins more flexibility as well as some wanted efficiency for testing and managing Win32 apps in Intune.