

In my previous post (^check the series link above^), we explored the new PowerShell Script Installer option for Win32 apps in Microsoft Intune.
But now that I have a better understanding of how it works, I was curious if it could help with packages build with PSAppDeployToolkit (PSADT).
Recap of PowerShell Script Installer #
The PowerShell Script Installer option allows you to upload a PowerShell script for the installer and uninstaller for your Win32 app. This has the advantage of not just being able to have a more complex installation logic, but makes it easier to change and update the installation logic without having to repackage and upload your intunewin file again and again.
Using PSADT with Win32 Apps #
Many of us are familar with using PSADT to create with our Win32 apps. But as you are building a new package, especially with an unfamilar app, the main pain point is what I described above. Constant changes mean having to repackage and upload the intunewin file again and again. You can do your best to do as much testing with PSExec to simulate the Intune installation experience, but it is not always perfect.
Why do you need to repackage? #
Why would you need to repackage the entire app just to change the installation logic?
If you are unfamilar with PSADT, the package structure is something like below with the main installation logic inside the Invoke-AppDeployToolkit.ps1 script file.:
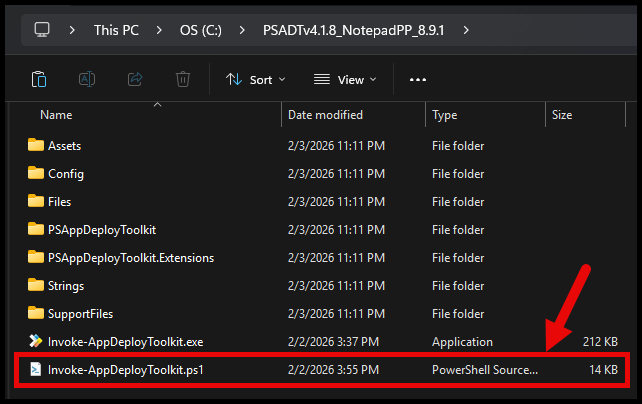
That Invoke-AppDeployToolkit.ps1 lives inside the intunewin file that gets uploaded to Intune. The installation of the package is then either triggered by:
- Calling that script directly like below:
%SystemRoot%\System32\WindowsPowerShell\v1.0\PowerShell.exe -ExecutionPolicy Bypass -NoProfile -File Invoke-AppDeployToolkit.ps1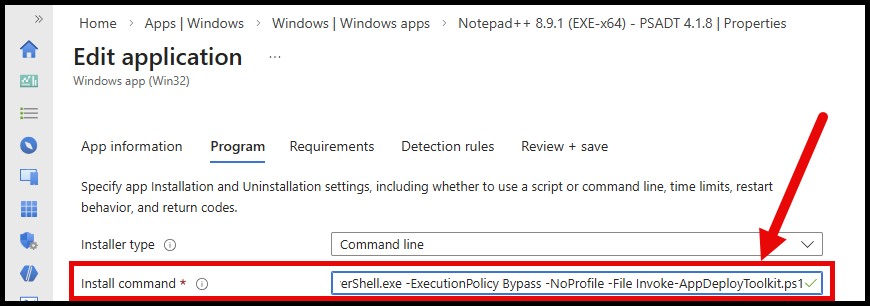
- Or by using the
Invoke-AppDeployToolkit.exehelper executable like below:
You don’t have to specify DeploymentType or the DeployMode parameters. The defaults in 4.1.x are:
-DeploymentType Install -DeployMode Auto
Invoke-AppDeployToolkit.exe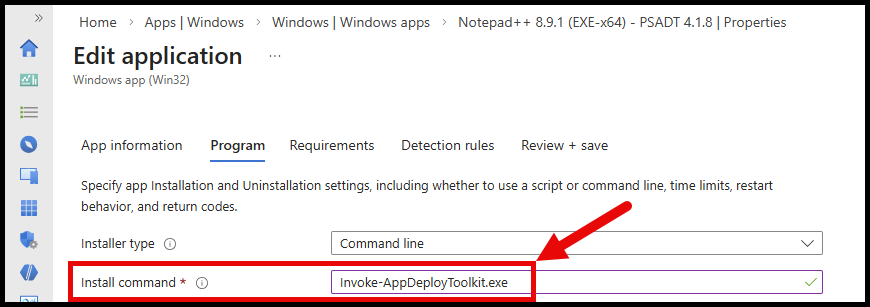
But either way, the installation logic is locked inside the package.
How can the PowerShell Script Installer help? #
Where the PowerShell Script Installer can help is by moving the Invoke-AppDeployToolkit.ps1 from inside the package, to being the installation script that you upload directly to Intune.
Lets give this a try!
Preparing the PSADT Package #
Start by creating your PSADT package as you normally would.
- Build a new template
- Add your installer files to the
Filesfolder - Edit the
Invoke-AppDeployToolkit.ps1script to add your installation logic
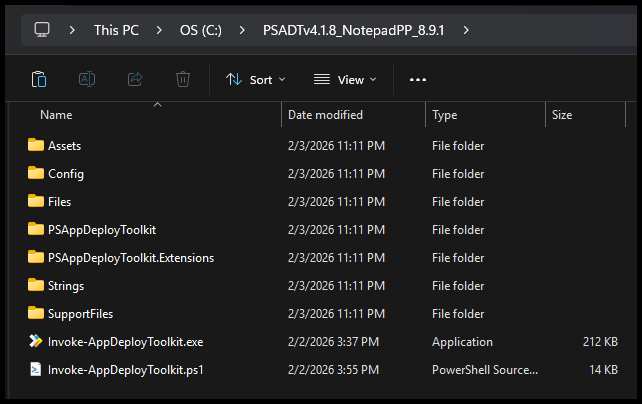
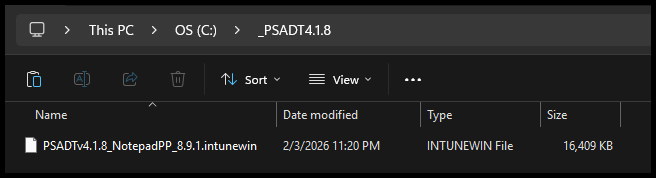
In my example, I’ll be deploying Notepad++ again, and creating an intunewin file of the below folder:
In my example, I am going to include my edited Invoke-AppDeployToolkit.ps1 file in the package.
This is not required because we will be uploading it separately to Intune, but it also won’t hurt to have it in there. This will hopefully make sense why shortly.
And now I’ve got my intunewin file ready to upload to Intune:
Preparing the Installer Scripts #
Now, we need to prepare the Invoke-AppDeployToolkit.ps1 scripts to be uploaded to Intune. You wil need to make 2x copies of the script as you will need one for the installer, and one for the uninstaller, and they will seperately be uploaded to Intune.
Depending on how you want your DeploymentType and DeployMode to be configured, you may need to modify your Invoke-AppDeployToolkit.ps1 script a little bit.
This is because although we can upload a script file, we can’t pass any parameters/arguments to it. The script will need to contain all the logic it needs to run the installation.
Install #
If you’re fine with the default DeploymentType = Install and DeployMode = Auto, then you can use the script as-is.
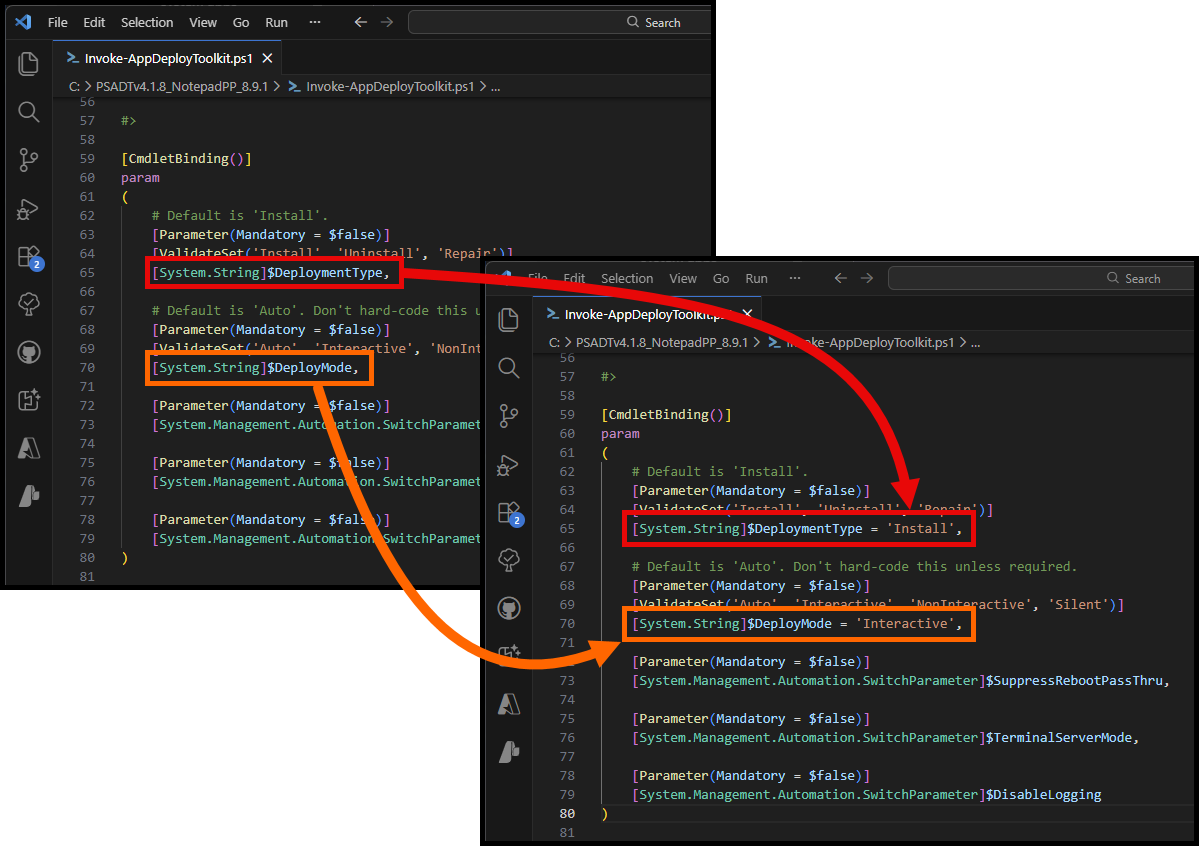
But for example, lets say you want to ensure DeploymentType = Install and DeployMode = Interactive, then you would need to modify the parameters of your script to something like below:
[CmdletBinding()]
param
(
    # Default is 'Install'.
    [Parameter(Mandatory = $false)]
    [ValidateSet('Install', 'Uninstall', 'Repair')]
    [System.String]$DeploymentType = 'Install',

    # Default is 'Auto'. Don't hard-code this unless required.
    [Parameter(Mandatory = $false)]
    [ValidateSet('Auto', 'Interactive', 'NonInteractive', 'Silent')]
    [System.String]$DeployMode = 'Interactive',

    [Parameter(Mandatory = $false)]
    [System.Management.Automation.SwitchParameter]$SuppressRebootPassThru,

    [Parameter(Mandatory = $false)]
    [System.Management.Automation.SwitchParameter]$TerminalServerMode,

    [Parameter(Mandatory = $false)]
    [System.Management.Automation.SwitchParameter]$DisableLogging
)
Save a copy as your Install script for Intune. I’m going to name mine Invoke-AppDeployToolkit-Install.ps1.
Uninstall #
Similarly, if you want to prepare the script for uninstall, you would need to modify the parameters of your script to something like below:
    # Default is 'Install'.
    [Parameter(Mandatory = $false)]
    [ValidateSet('Install', 'Uninstall', 'Repair')]
    [System.String]$DeploymentType = 'Uninstall',

    # Default is 'Auto'. Don't hard-code this unless required.
    [Parameter(Mandatory = $false)]
    [ValidateSet('Auto', 'Interactive', 'NonInteractive', 'Silent')]
    [System.String]$DeployMode = 'Interactive',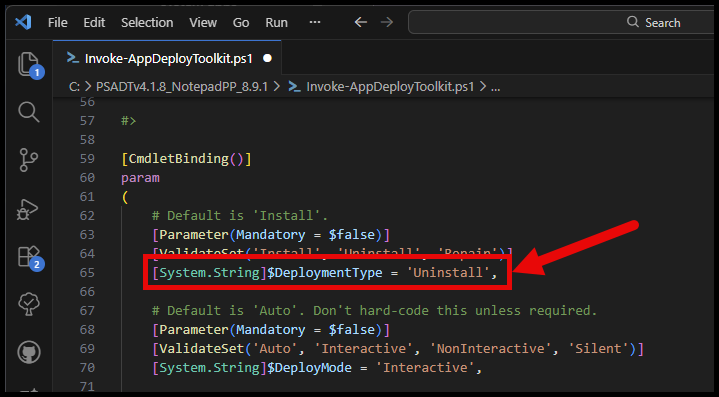
Save a copy as your Uninstall script for Intune. I’m going to name mine Invoke-AppDeployToolkit-Uninstall.ps1.
Create the Win32 App in Intune #
Now, create a new Win32 app in Intune as you normally would.
- Upload your intunewin file

- For the
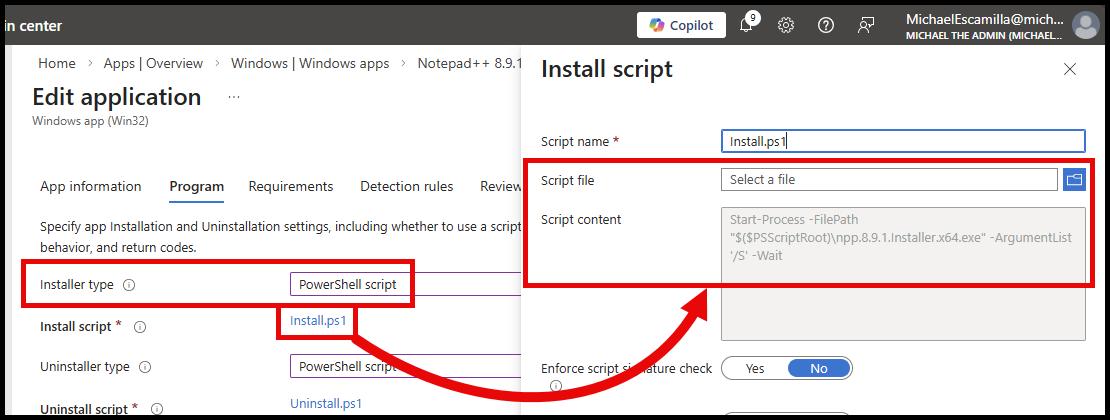
Programstep, it’s a little quirky
The Installer Type dropdown will be greyed out, until you enter some text into the Install command box
- In my below example:
- You can see that after I entered
<RandomText>into theInstall commandbox, theInstaller Typedropdown became available. - Otherwise it will look like the Uninstall field below, where the
Installer Typedropdown is greyed out.
- You can see that after I entered

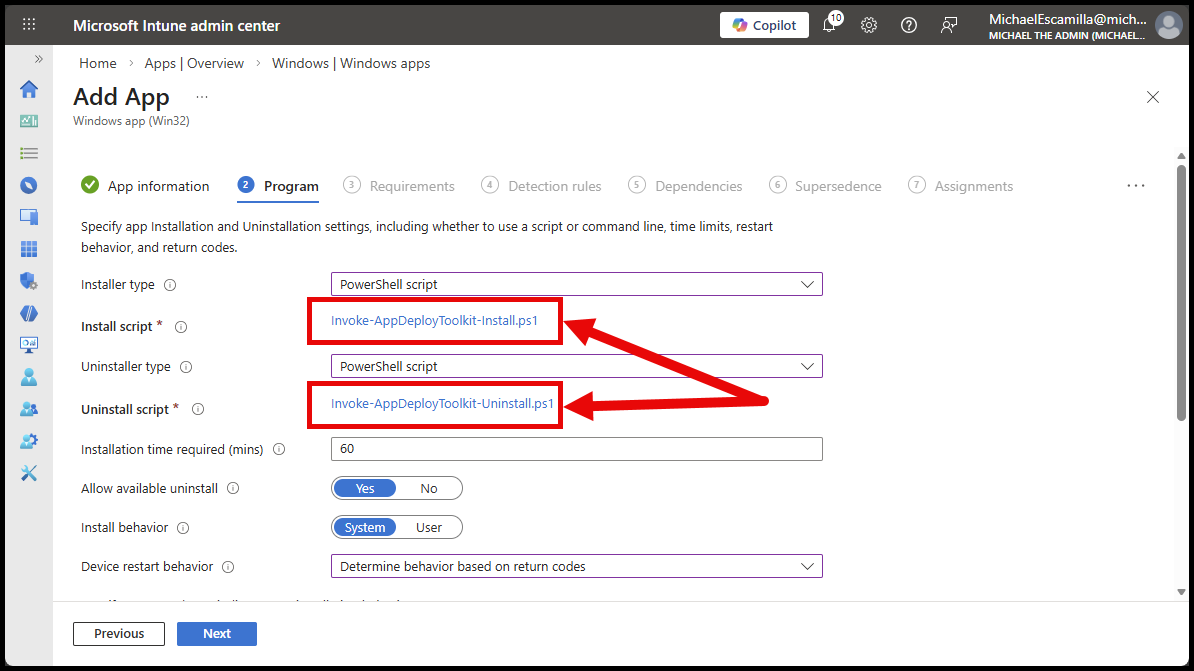
One you have the PowerShell Script option selected, upload the installer scripts you prepared earlier:
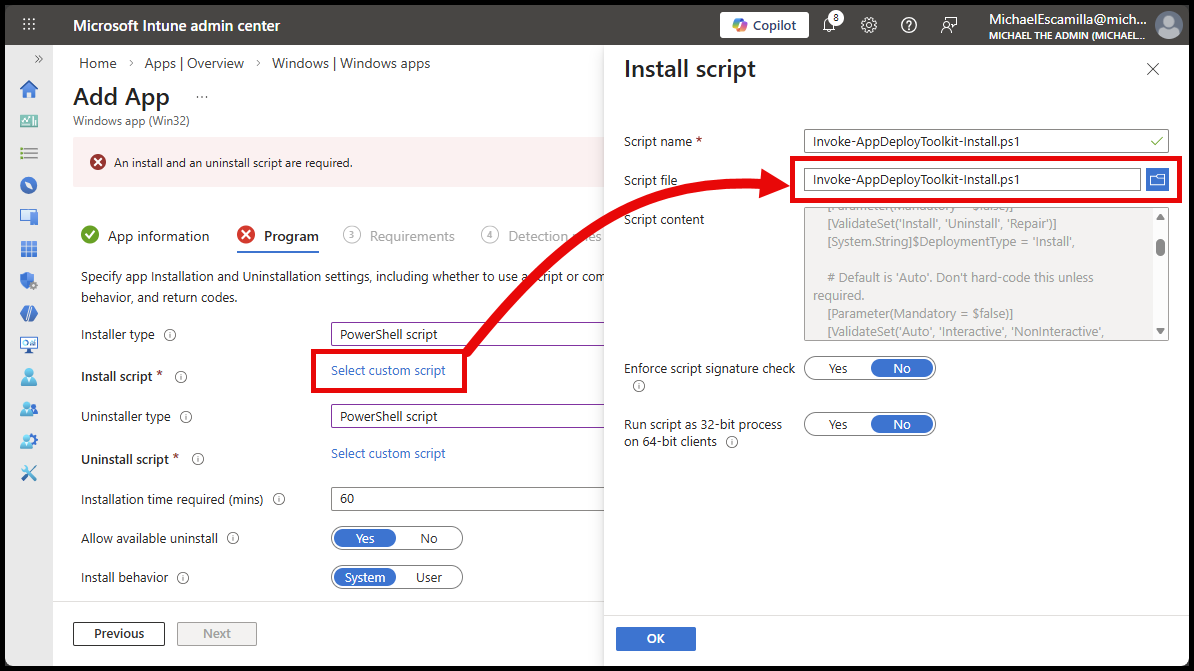
And you should end up with something like below:
Finish the rest of the Win32 app creation as you normally would.
Testing the Win32 App #
Now lets test out the Win32 app deployment.
How to verify it’s using the PowerShell Script Installer #
To ensure that the installation is using the PowerShell Script Installer and not running the Invoke-AppDeployToolkit.ps1 from inside the package, I’ve made a change to script so that I can easily verify it.
Script in the Package #
In the Invoke-AppDeployToolkit.ps1 that is inside the package, I have:
AppName = 'Script Installer Notepad++ 8.9.1 (x64)'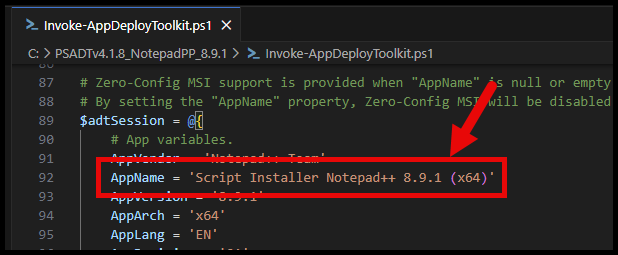
Script uploaded to Intune #
And in the Invoke-AppDeployToolkit-Install.ps1 that I uploaded to Intune, I have:
AppName = 'Testing the Script Installer feature with PSADT'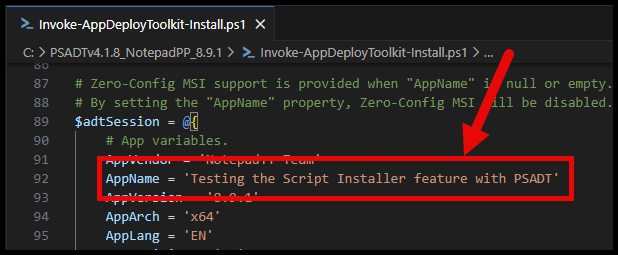
Running the Installation #
I’ll get into some of the deployment details, but check out my previous post in this series for all the details
Trigger the installation #
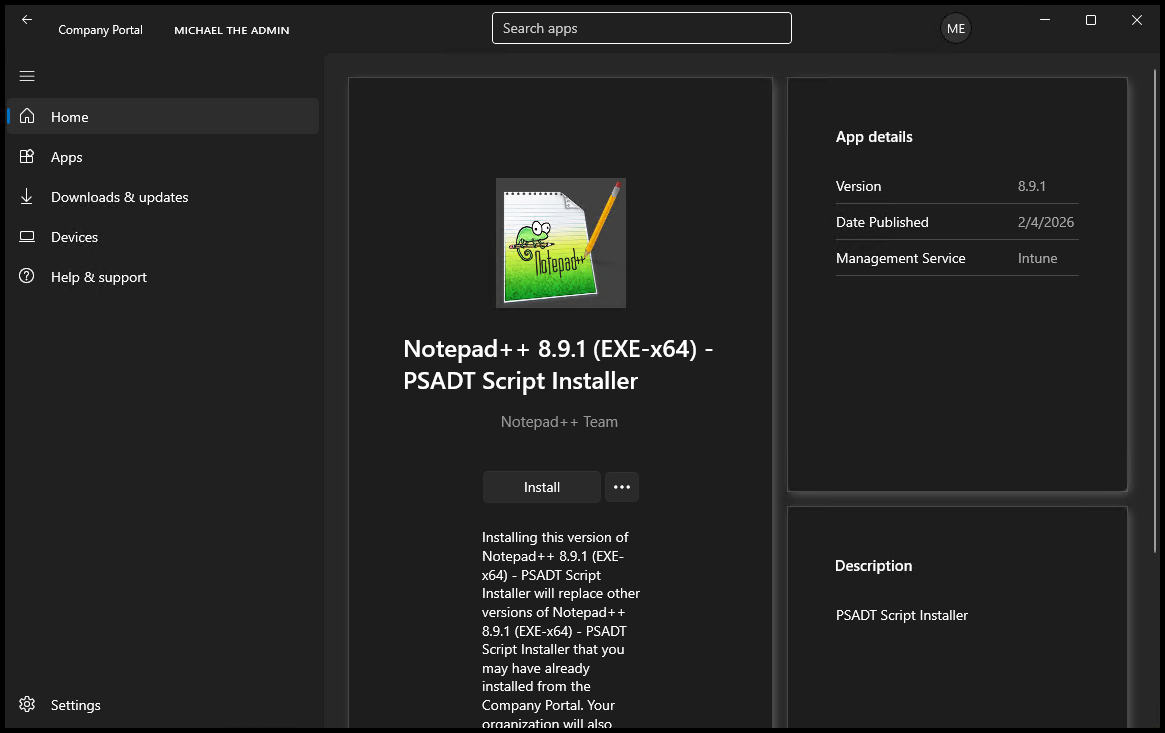
I’ll start the installation from the Company Portal:
Content Download #
Here is where you’ll see an extra step compared to a normal Win32 app installation.
You will see the normal download and extration of the win32 app:
[Win32App] Unzipping file on session 2 from C:\Program Files (x86)\Microsoft Intune Management Extension\Content\Staging\b2bb69fa-8ef9-4f49-b72c-6aa336b5ff7a_1\b2bb69fa-8ef9-4f49-b72c-6aa336b5ff7a_1.zip to C:\Windows\IMECache\b2bb69fa-8ef9-4f49-b72c-6aa336b5ff7a_1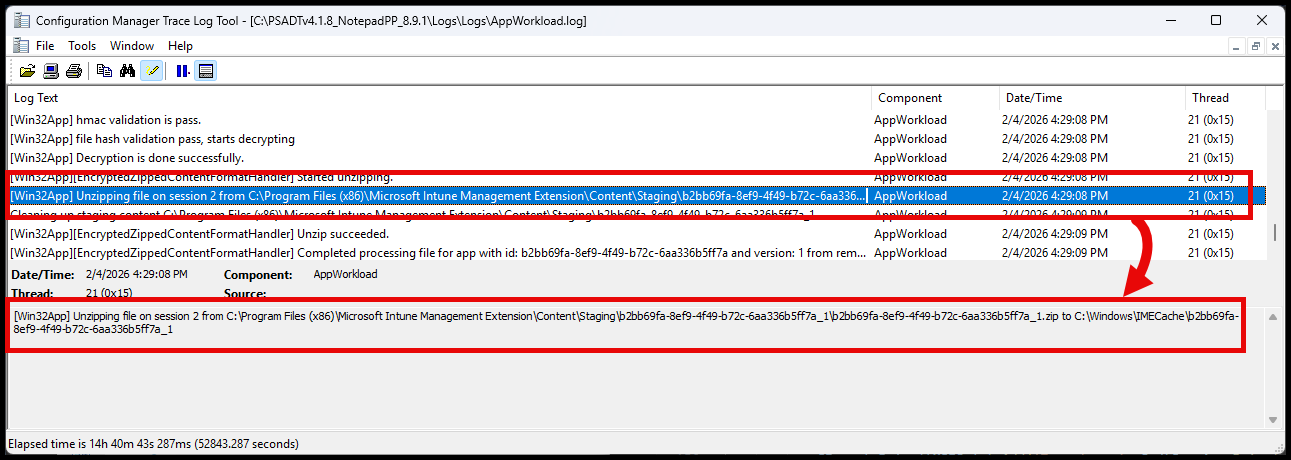
But you will also see a second download step for the PowerShell script installer. The Extraction path is same folder as the package content. The filename will be the ID of the script:
[Win32App] Decompressed: to C:\Windows\IMECache\b2bb69fa-8ef9-4f49-b72c-6aa336b5ff7a_1/ef1f08c4-3136-4ed6-9a05-5f8964e88cfd.ps1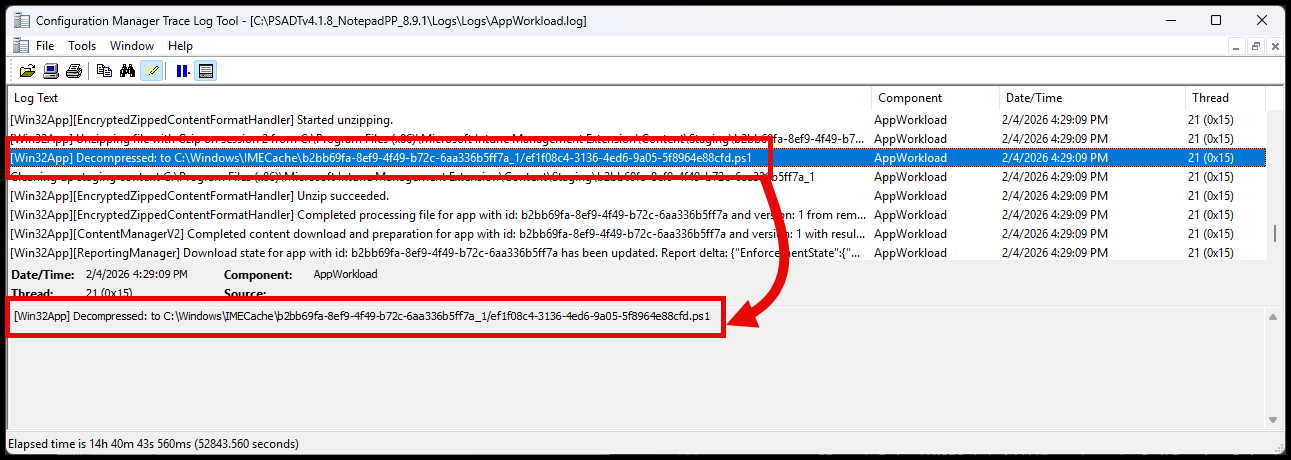
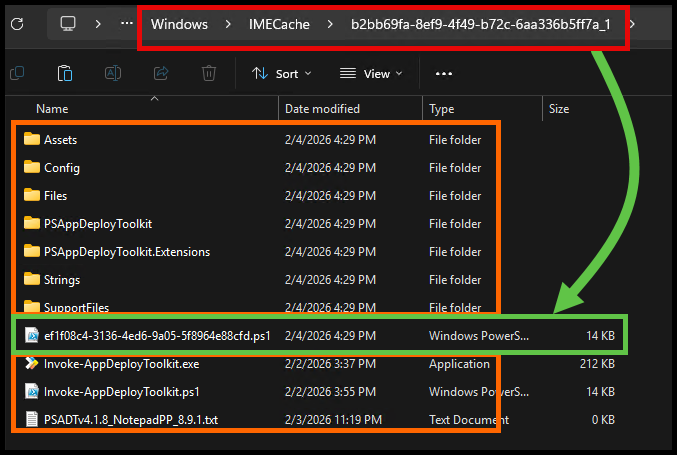
What you’ll see in the IMECache folder is something like below, with both the package content and the script file together. And hey, it’s a full PSADT package now!:
Installation #
Finally, the installation runs. You can see the full install command line being used is calling powershell.exe and using the script that was downloaded earlier:
[Win32App] Installer script command line: "C:\Windows\System32\WindowsPowerShell\v1.0\powershell.exe" -NoProfile -ExecutionPolicy Bypass -File "C:\Windows\IMECache\b2bb69fa-8ef9-4f49-b72c-6aa336b5ff7a_1\ef1f08c4-3136-4ed6-9a05-5f8964e88cfd.ps1"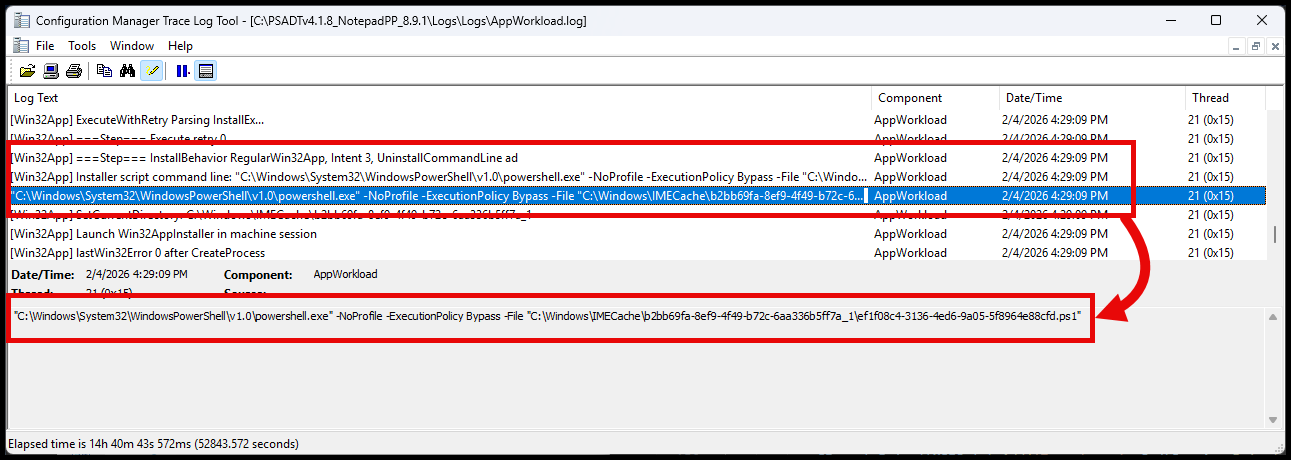
This at least tells us that the installation script is being ran.
Results #
The appworkload.log tells us that it’s using the installer script, but we can also see from the PSADT Prompt, that it’s using the AppName = 'Testing the Script Installer feature with PSADT' that we set in the script uploaded to Intune, and not the one inside the package.
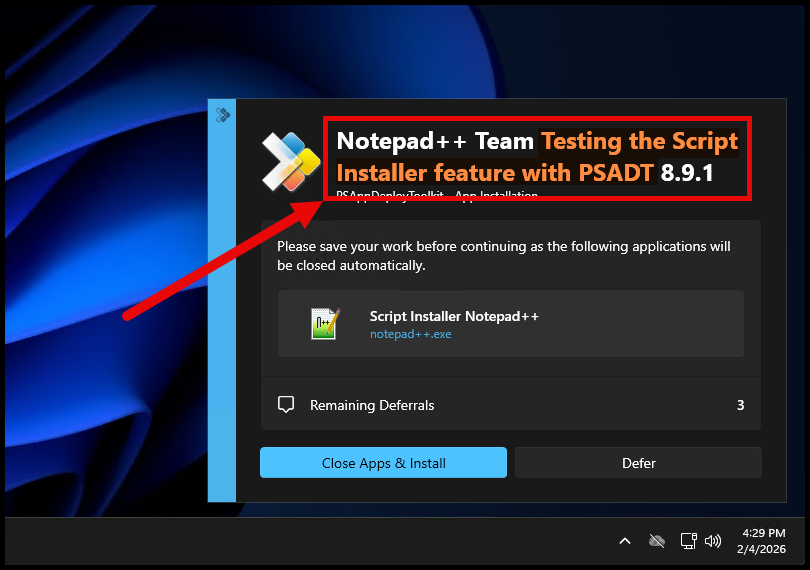
And we can see the log name reflects this value as well:

So this confirms that the installation is indeed using the PowerShell Script Installer that we uploaded to Intune, and not the script inside the package. And it successfully ran our PSADT package!
Conclusion #
This was a fun experiment to see if we could leverage the PowerShell Script Installer option with a PSAppDeployToolkit package.
Did it work? #
Yes! The concept works and does address that initial pain point I brought up at the beginning of having to repackage the entire app just to change the installation script.
Is it practical? #
That’s up to you. This does add some management overhead of having to maintain essentially the same Invoke-AppDeployToolkit.ps1 script twice, one for install, and one for uninstall.
It does at least give you the flexibility to change existing win32 app packages you might already have deployed.
Anything else to consider? #
Although you can upload a new Invoke-AppDeployToolkit.ps1 script, you’ll want to ensure you’re uploading a compatible version for the template version of PSADT that you used to create the package originally. So that is another added management overhead to consider, be sure to keep track of your source files!
Any other ideas? #
Let me know if you think of any other interesting ways to leverage the PowerShell Script Installer option with PSADT! I’d love to hear your thoughts.